Group 1

Conservation Kits Provide Instant Savings

As the climate crisis on our planet has become a climate emergency, a lot of us are looking for different ways to improve our carbon footprint. While this may initially seem like a daunting and expensive task, it truly isn’t. There are many small ways to start saving both energy and water around your home or building that won’t break the bank. Conservation kits are prepared with these types of savings in mind, and the items they contain provide instant savings once installed.

Improving Energy Efficiency

According to Time.com, “On average, remote workers have seen a $40-50 monthly increase in their energy costs—or as much as $600 a year.” With energy bills steadily on the rise, employing measures that can produce savings right away is even more pressing. Common items you’ll find in conservation kits include:

  • LED Light Bulbs, which use up to 80% less energy than their incandescent counterparts
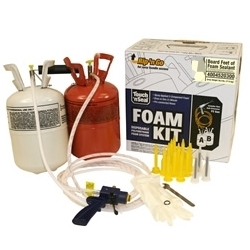
  • Closed Cell Foam to limit drafts and heat from entering through doors
  • Outlet Gaskets that block air leaks from outlets
  • Rope caulk to seal air from entering through windows
tidy room filled with furnitures

Help Me Save Water

Each day, the average home in the United States uses approximately 80-100 gallons of water at home. A surprising number, right? When you consider the amount of times we wash our hands and dishes, flush the toilets, and even shower, this number really begins to take shape. Let’s take a step back, and see how we can bring this number down.

  • Low flow aerators reduce the amount (but not the pressure) of water coming from faucets. Their flow rates range from 0.5-2.0 gallons of water per minute.
  • Low flow shower heads follow this same concept, except with the shower. Many of these shower heads are also self-cleaning.
  • A toilet tank bank is placed in the toilet tank to limit the amount of water used per flush.
  • Outdoor water savers allow you to expand water savings outside of the home and into your gardens.

Saving energy and water at home, or in your building, can actually be quite simple. With a few quick installations of items found in conservation kits you can be well on your way to helping the climate and your wallet at the same time.

Group 1

Benefits of Q-Lon Door Seal Installation

Q-Lon Door Kits
Q-Lon Door Kits

The door of a home is where we let in and welcome family and friends. Unfortunately, it’s also where we let in air leaks, insects and moisture. Unlike loved ones, these can come into the home through doors even when they’re closed. The older the home, the more likely it is that you have a door (or a few) that could benefit from being properly sealed. Installing a q-lon door seal is a quick and cost-effective way to solve these problems, save energy, and ultimately lower energy bills.

Passing the Test

The simplest way to check for air leaks is to look at the door during daylight hours. If you see sunlight peeking through the door, it needs to be sealed. If you notice moisture at the door when it rains, it needs to be sealed. If by chance, you catch an insect trying to sneak into the home, the door needs to be sealed.

Sealing Gaps

Q-lon is designed specifically to be used on the top and sides of doors. It seals gaps that measure up to 1/2″ in size. If your air leak is smaller, no worries. A q-lon door seal can be cut to fit smaller doors and seal smaller spaces. It is made up of polyethylene-clad urethane foam, and contains a special backing for use on specific door types. The exact one you’ll need depends on what the door you’re sealing is made up of:

  • Metal doors – Use the aluminum q-lon weatherstrip.
  • Wood doors – Use the wooden q-lon weatherstrip.
  • Vinyl – Use the vinyl (PVC) q-lon weathertrip. This is the most commonly used type for residential doors.

Comfort and Savings

If you left the oven door open while baking, it would take considerably longer to reach the right temperature. The same concept can be applied to all doors. When inside air leaks out, and outside air comes in, regulating the temperature becomes increasingly difficult. Installing a q-lon door seal gives you back some of that control. It does so without you having to spend hundreds, or even over a thousand, on a replacement door. The material is industrial-grade, strong enough to seal gaps for years, and costs under $13 a piece. Installing this weatherstrip lets you start realizing savings without having to reach into your savings to get it done.

Narrow Q-Lon Door Weatherstripping Kit with Vinyl Carrier - Brown DS060-BR-N
Narrow Q-Lon Door Weatherstripping Kit with Vinyl Carrier – Brown DS060-BR-N

Q-Lon Door Kit with Vinyl Carrier Door Weatherstripping White

Q-Lon Door Kit with Aluminum Carrier Door Weatherstripping Brown
Q-Lon Door Kit with Aluminum Carrier Brown

Group 1

Cost Effective and Easy to Install Weatherization Options

To prevent cold air from entering your home during winter, and hot air from flowing in during summer, you need to close up the gaps in your windows to create a tight seal.

Not only will your home feel more comfortable, you will also lower your monthly energy costs with these inexpensive window weatherization tools.

Rope Caulk

Caulking is a method of weatherstripping that targets the crack, gap, hole, or opening that allows air to seep through. Basically it’s like sticking silly putty in the exposed area to seal it off. However, rope caulk provides a better stick, can weatherproof windows in any weather condition, and blends in with your decor. rope tape

Installation:

  • Clean, clean, clean the area where caulk will be used.
  • Peel of a lay of the rope caulk “beads” and divide it based on how much you need.
  • Press to seal.

Foam Tape

Foam tape is used to seal windows that slide or swing. It sticks to the edges or bottoms of windows to prevent air leakage when windows are closed.

Installation: Foam tape is easy to install and at less than $3 it is an inexpensive weatherization solution.foam tape

  • First, clean and dry the area  where the tape will be applied. If the area is dirty, wet, and/or cold, the tape won’t stick properly or it will easily loose its stickiness factor. It must be more than 40 degrees Fahrenheit.
  • Cut the amount of foam tape needed based on the length of window sides/bottom.
  • Remove the adhesive backing then press the tape into place to cover the area in need of sealing.

Shrink and Seal Window Kit

If you have scissors, a blow dryer, and $4 you can easily weatherproof windows with a Shrink and Seal Window kit. This kit will seal the whole window from the inside and increase the R-value, or insulating power, of the window by as much as 90%.

Installation: window kit

  • Again, you need to clean and dry the area before applying any sealing. You should also clean the insides of windows because you won’t be able to clean that area again until you remove the shrink film.
  • Cut the amount of shrink film needed. Cut enough film to cover the entire window (including some of the frame area).
  • Remove the backing from one side of the two-sided tape and stick it to the top, bottom, and sides of the window. After installing the tape, remove the adhesive backing from the other side.
  • Apply the shrink film around the window, gently stretching it as you work your way from one corner of the window to the other.
  • With the blow dryer on the highest setting, slowly move the dryer across the film to tighten it over the window. Don’t stand too close to the window while doing this, otherwise you’ll melt the shrink film.
  • Trim any film that’s left over.

Save

Save

Save

Group 1

Use Q-Lon Weatherstrip to Prevent Energy Loss from Doors

Q-Lon Weatherstrip
Q-Lon Weatherstrip

A door’s weather seal can wear out over time, causing cold and costly drafts to flow into your home. A simple way to check if your doors have this problem is through a sight test. While the sun is out, if you can see light coming in through the door when it is closed, you definitely have an air leak on your hands.

You could also use a smoke pencil to identify drafts and air leaks.

Installing a q-lon weatherstrip is beneficial for a number of reasons:

  • Seals up to ½” gaps. Sealing air leaks from the door can reduce home energy loss up to 11%.
  • Reduces energy loss eases the burden on the heating/cooling systems, thus lowering bills.
  • Limits unwanted air exchanges in the home and provides more control over home temperatures.
  • Acts as both a sealant and a door stop.
  • Fits standard doors, but can be cut to fit smaller doors.

This type of door weatherstripping is comprised of polyethylene-clad urethane foam that remains flexible through temperatures as low as minus 4 degrees Fahrenheit. The foam is secured to an aluminum (metal/steel) or vinyl (PVC), carrier. The type of carrier that would be ideal for your home depends on the door that the weatherstrip will be installed on:

  • Aluminum: Heavy duty carrier that is ideal for metal or wood doors.
  • Vinyl: Suitable for use on doors that are not metal, steel, or wood.

Weatherproofing doors with a q-lon weatherstrip is an easy, inexpensive way to save on energy costs for your home.

Group 1

Energy Saving Kits and Weatherization Workshops Available Across the US

Weatherization Kit

The U.S. Department of Energy Weatherization Assistance Program provides grants to states, territories, and some Indian tribes to improve the energy efficiency of the homes of low-income families by providing energy conservation products.

The grants enable local governments and nonprofit agencies to provide weatherization services and home energy upgrades. The low-cost improvements, like adding weather stripping to doors and windows to save energy, lead to long-term savings.

In addition to helping families save money, the resources saved through energy conservation also helps our country reduce its dependence on foreign oil and decreases emissions of greenhouse gases.

The Weatherization Assiatance Program (WAP) has training centers across the country and boasts some impressive statistics:

  • Since the inception of the WAP, over 7 million homes have been weatherized with DOE funds.
  • Energy savings average 35% of consumption for the typical low-income home.
  • Occupants of weatherized homes experience in the range of $400 in annual savings on their energy bills, at current energy prices.
  • Weatherization measures reduce national energy demand by the equivalent of 24.1 million barrels of oil per year.

If you do not have a WAP in your area, look for a Community Action Partnership (CAP) program.

Their weatherization program is available for both homeowners and renters who receive fuel assistance. Using local licensed contractors, the program provides free major improvements, such as attic and wall insulation, air sealing, and other energy-saving repairs.

These organizations and other local agencies, like the Community Energy Project in OR, offer weatherization workshops to learn how to install energy saving devices in your home.

Energy Saving Kits often include items such as reusable vinyl storm window kits, door weatherstripping, pipe insulation, a compact fluorescent light and more.

Conservation Mart offers a wide variety of weatherization, energy conservation products and water saving devices directly to consumers and we are happy to customize kits for your organization. Please call us for a quote: 1-800-789-8598.

Save

Group 1

Get the Most Out of Polyurethane Foam Insulation

Polyurethane Foam
Polyurethane Foam

Polyurethane foam has been around since the 1970s, but its use has recently exploded with more and more people jumping on the conservation bandwagon. DIY spray on insulation is a simple, cost-effective solution to air leaks in the home, blocking air intrusion and escape at the same time. In order to get the most out of foam insulation, here are a few bits of information to keep in mind.

What Foam Do You Need?
The biggest factor to consider when deciding which foam to use is simply this: how much area do you need to cover? Both the high expansion foam and low expansion foam expand to cover the area where sprayed, but they differ in a few ways as well.

High Expansion Foam
High expansion foam covers larger gaps, cracks, and the like than low expansion foam.  It also expands 30x when sprayed at 1″ thickness, so I’d advise against spraying liberally.

Low Expansion Foam
In contrast, low expansion spray foam is best used on smaller gaps and only expands by 10%.

How to Use the 2-tank Foam System
The 2-tank foam system makes installing foam insulation an easy do-it-yourself project, so as with any DIY project, make sure to wear protective gear.

In the 2-tank foam system, Tank B must be warmed up to make it the same creamy consistency as A; this allows for an even stream of foam. A few methods for warming Tank B include:

  • Keeping it in a warm room
  • Putting it in a tank warmer
  • Warming the tank in an electric blanket

The 2-tank system uses high expansion foam, so remember that spraying 1″ of thickness will expand 30x.

Which Rooms Need it the Most?
When installed in the draftiest, gap-ridden areas in the home, polyurethane foam insulation can save you up to 20% on cooling and heating costs alone. So which areas have the most potential for energy loss?

Attic and Garage
These areas typically suffer from poor insulation, making it easy for winter and summer to wreak a lot of havoc. Attics and garages can sometimes reflect (and even magnify) the temperature outside. The main source of insulation problems come from the ceiling and walls; check these first before going over the rest of the room for any missed gaps and cracks.

Basement
Basements often deal with humidity, which can lead to mildew and mold. First, make sure the basement receives proper ventilation, then seal all the air leaks. For basements, air leaks can be found around areas that lead outside, like air vents, ducts, and pipes.

Home Exterior
It may not seem like a big deal, but exterior gaps can cause just as much insulation problems as the ones inside. Dryer vents and water faucets (with hoses) are unexpected culprits of air leaks and can also contribute to that inflated energy bill you see each month.

Applying polyurethane foam insulation will help you control the temperature in your home and finally get a better grasp on the outcome of your energy bill.

Save

Save

Group 1

Sealing Gaps with Exterior Door Weatherstripping

Exterior Door Weatherstripping

Call them cracks, gaps, leaks or however you want to see it, but any opening that allows air through the door adds stress to your energy bill. Prevent air leaks by sealing gaps with exterior door weatherstripping. You’ll gain control over the energy usage in your home while trimming the energy expenses off your utility bill.

Do you need weatherstripping?
It doesn’t matter if the crack, gap, or hole is micro-sized or big enough to slip a few magazines through; any air leak takes the comfort out of your home and costs you extra in heating and cooling expenses.

Test for air leaks
If the sunshine outside is spilling into your home through a closed door, you have an air leak situation. Another way you can tell is if rain always finds its way inside your home through doors even when the door is closed. Easily combat this issue by installing exterior door weatherstripping.

Q-lon weatherstripping
Q-lon is an type of weatherstripping that is installed on the top and sides of doors. It is backed with aluminum (metal/steel), vinyl (PVC), or wood and made of polyethylene-clad urethane foam. Available in white and brown colors, q-lon is specifically made to fit different door types:

  • Aluminum – Made for metal doors
  • Wood – Made for wooden doors
  • Vinyl – This type can be used on most home doors

This type of weatherstripping seals up to 1/2″ gaps on standard doors and can be cut to fit smaller doors.

Reasons to seal
Energy Usage/Money Waste
On average, exterior doors are responsible for roughly 11 percent of all energy loss in the home. You close the door hoping to keep out the heat or cold, but all of that air still gets in. This:

  • Causes inconsistent temperatures in the home
  • Raises your energy bill. Every increase/decrease in degree that you turn up/down the AC or heater causes you money.

Block Unwanted Guests
Well, sealing only keeps out the type of guests that can squeeze through a closed door. Bugs and other critters are always on the hunt for ways to enter your home. Installing exterior door weatherstripping leaves one or two less ways for them to invade your home.

Sealing door exteriors is a simple solution to a costly and energy-stealing problem.

Group 1

Insulating with Q-Lon Weatherstripping Prevents Drafts from Doors

Did you know that air can easily escape in and out of the home through exterior doors whether or not they are open? This is because there are a number of cracks and gaps located between the door and the outside area. These holes are small, yet large enough to impact the level of home comfort, as well as the amount of money spent on heating every winter. Installing q-lon weatherstripping for doors will eliminate this unwanted air infiltration as well as the effect it has on energy bills.

Q-Lon Weatherstripping

Q-Lon is made up of a carrier that has polyethylene-clad urethane foam securely attached. Carriers come in PVC (vinyl), aluminum (metal), and wood to provide insulation for a variety of doors. The foam is UV stabilized, allowing it to remain flexible at temperatures as low as -4 degrees Fahrenheit. This form of door insulation is long lasting, as it does not splinter, rot, distort, or absorb water.

The q-lon weatherstripping is light-weight, and easy to install. Simply attach the PVC carrier to the frame of the door in a way in which the foam gasket pushes up against the door when the door is closed. Then, nail it in using the nails that come with the q-lon kit. If necessary, it can be cut to fit a smaller door opening. Q-lon weatherstripping seals 1/2-inch gaps, and works as both weatherstripping and a doorstop.

Approximately 11 percent of all energy loss in the average home occurs through exterior doors. Limiting the amount of unwanted air exchanges that occur through doors reduces not only energy loss, but also the costs of heating during winter, as you will have more control over the temperature in the home. The weatherstripping pays for itself with the amount of savings accumulated, and continues to save you money on energy bills long after.

Group 1

Applying V Seal to Your Window for Air Sealing

Pick a window in your house. When you place your hand to it do you feel a draft coming in? If you do, you are facing an insulation problem. Windows that are not properly insulated bring drafts in, and take money out of your wallet. Creating a tight seal around the windows allows you to save energy, maintain a comfortable temperature in the home, and reduce the amount of money spent on utility bills. V-seal weather stripping is among one of the most cost-effective tools that can be used to solve a window insulation problem.

V Seal

You may be wondering, “What is a V Seal?” V-seal weather stripping is a roll made of polypropylene used specifically to insulate windows and doors. The roll is as long as 180 feet. On one half of the seal is an adhesive backing for application. Choosing to insulate windows with this weatherstripping tool will costs as little as $23.00. It seals the window from those annoying drafts, helping to reduce the amount of energy loss (and costs) from the windows in a home.

Choosing to insulate windows with a V-seal weather stripping is simple. Before installation, measure the window and clean the application surface. Once this has been done, use scissors to cut the V Seal to the appropriate length. Next, fold the piece that you have cut into the shape of a V. Remove the adhesive, and use your fingertips to place the seal on the cleaned surface. That’s all it takes.

Save

Group 1

Cheap ways to weatherproof windows


Windows can be a major source of drafts and heat loss, especially older windows and those with some gaps. Of course, replacing the window with more energy efficient windows such as double pane windows is the most effective way to lower your energy bills. However, this can be an expensive option, especially if you have a lot of windows. Morever, this might not be feasible if you’re living in a rented property e.g. apartment, condo or even house.

So what can you do short of replacing the windows? Actually you can take several cheap but quite effective steps, to weatherproof you windows.
1. Install a plastic storm window. This project is cheap and should only take 1-2 hours. Here’s how it works: The plastic storm window kit consists of a plastic spline and channel system to create a seal in front of the window. The storm is installed by attaching the lengths of adhesive white plastic channels around the frame of the window. Simply cut the plastic to the correct size to cover the window. The plastic is held in place with a thin plastic strip (the “spline”) that locks into the channel. The seal is achieved in a way similar to that of a sealing plastic bag. If well maintained, this solution is reusable, unlike the plastic film that is simply stuck on the window with an adhesive tape.

2. Use a rope caulk around the edges of windows to reduce drafts and air coming in. It is installed by simply pressing it into place with your fingers. It’s easy to apply and easy to remove Rope caulk is a great solution for apartments.

3.Use a V Seal around windows. V-seal should be installed in the seams around the window frame so that create a firm seal when the window is closed.