Group 1

What is the Difference Between a Tier 1 and Tier 2 Advanced Power Strip?

In the world of power strips, there are two types of advanced power strips. Each has its own set of features and capabilities that make it a good option for different situations in your home. The first type is called a tier 1 advanced power strip, and the second is called a tier 2 advanced power strip. In this article, we’ll explain what these terms mean and how they differ from one another so you can decide which type is right for you!

What is a tier 1 advanced power strip?

A tier 1 advanced power strip is the most basic type of APS. It consists of a single control outlet, usually accompanied by two always-on outlets, and three or more outlets that are automatically switched on or off based on the on/off status of the control device.

These are ideal for use in homes, where they’re plugged into a wall socket next to an appliance like your television or computer monitor. They’re generally inexpensive, so if you need to protect just one device from surges or spikes, this might be the best option to go with.

Tier 1 Advanced Smart Power Strip (APS)

What is a tier 2 advanced power strip?

Tier 2 Advanced Power Strips (APS) are more expensive, more powerful, and more durable than their tier 1 counterparts. These devices are designed to handle higher loads while maintaining the same level of safety as Tier 1 Advanced Power Strips. Some tier 2 devices also feature:

  • Remote switch capability so that you can essentially control the power strip from your phone or other mobile device
  • Timer connectivity so that you can automatically turn off anything plugged into one of these power strips after a certain amount of time has elapsed
  • Software and hardware filtering technology that filters out IR interference from non-AV equipment
Tier 2 Advanced Smart Power Strip

Advanced power strips can help you control your home’s electricity. There are different tiers of APS to consider.

Advanced power strips (APS) are strips of outlets with an extra function: they let you control the flow of electricity to your devices. APS have a number of different tiers and functions, which can help you save money, protect your electronics and protect your home against surges.

Group 1

Maximum Safety Fireblock Low Expansion Foam

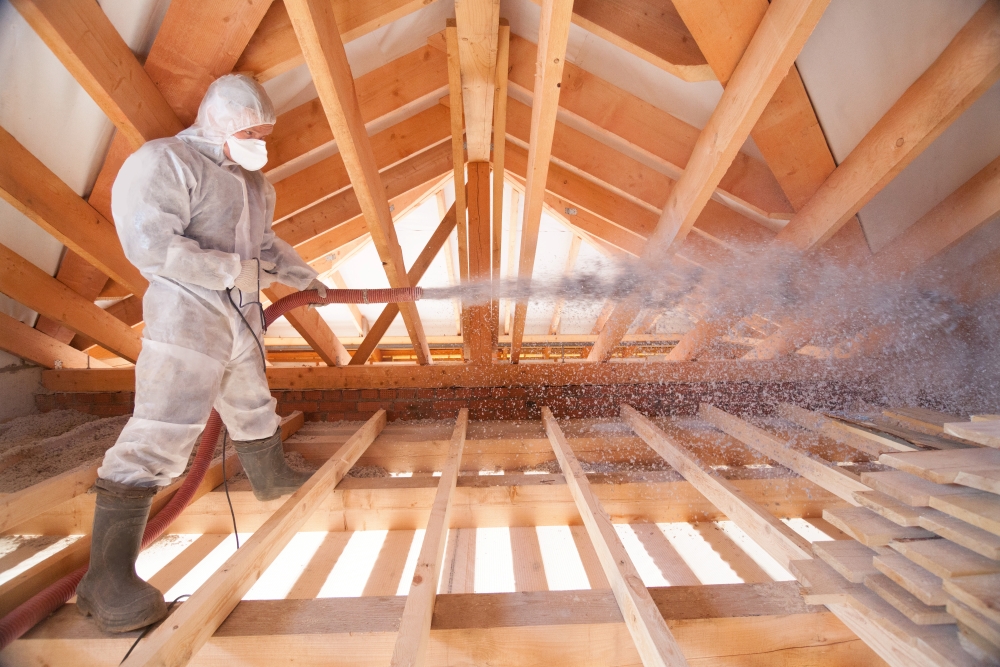
Insulating your home or building is a top priority whether you’re starting a new project or upgrading an existing structure. Fireblock foam is a low expansion foam that takes this just a step further. In addition to reducing energy loss and costs, it also works to limit the spread of flames, toxic smoke, and harmful gasses.

How Does Fireblock Foam Work?

The foam is designed to expand ever so slightly to properly fill in cracks and gaps in areas where it is required. The expansion alone makes it a much more effective tool for fire blocking than other standard materials. Additionally, the bright orange color provides clear visibility to inspectors as a Type V construction approved fireblock foam. Once bonded, it blocks air from entering the intended space, helping to fend off the free passage of smoke, flames, and other by-products of combustion between floors, rooms, and wall cavities.

fireblock foam

Fireblock foam is a low expansion foam that protects residential and commercial spaces from smoke, flames, and other by-products of combustion between floors, rooms, and wall cavities.

Properly Sealing with Low Expansion Foam

When working with polyurethane foam or other sealants, be sure to wear eye and skin protectants. This includes goggles or protective glasses with shields, nitrile gloves, and protective clothing. Once ready, make sure to apply the foam in a space that is well-ventilated and with certified respiratory protection or a powered air purifying respirator (PAPR). Each manufacturer of polyurethane sealants creates a detailed Safety Data Sheet (SDS) with specifics that should be carefully read before applying foam.

Fireblock foam is typically applied with a foam gun or straw. When applied, it is:

  • Tack-free in approximately five minutes
  • Cuttable in approximately one hour
  • Fully cured in 12-24 hours

To achieve the best results, make sure the foam being used is ICC compliant for fire blocking, and has been tested with modified ASTM-814 and UL-1715. Fireblock foam that meets these requirements withstand the pressure of flames more than twice as long as other competing foams, providing precious additional seconds to a dangerous situation.

Group 1

5 Simple Home Water Saving Devices

Home Water Saving Products
Home Water Saving Devices

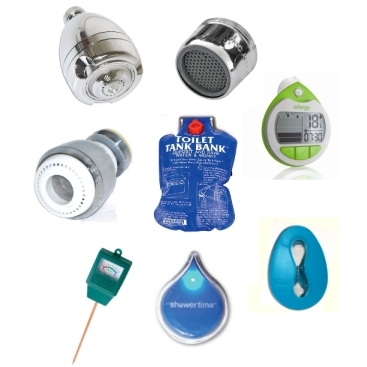
Sometimes it’s the simplest changes that can have the biggest effect on water consumption in the home. Water saving products are low-cost but have a long-lasting effect on home energy usage and the utility bill. To make this easy change, here are 5 simple home water saving products you can install today.

Showerheads
If your showerhead can fill a bucket with 1-gallon of water in under 20 seconds, it’s time to change to an earth-friendly model.

Savings
For less than $10, you could purchase a Niagara Earth showerhead that saves up to 5,475 gallons of water annually. Low-flow showerheads also decrease energy usage, so showerheads that release 1.5 gpm (gallons per minute) save around $70 – $105 per year on the electric and gas bill.

Features
Niagara Earth Showerheads have many varying features:

  • Massage – settings range from a soft spray to an intense massage
  • “Pause” option – slows or stops the water from flowing and is especially handy when you don’t need the water to run, like while soaping up or shaving
  • Flow Control Technology – gives you consistent, even water pressure regardless of the pressure from your water system

Faucet Aerators
Faucet aerators are like caps on the tip of faucets. However, unlike caps, faucet aerators help water flow out evenly and consistently while cutting down on water and energy usage.

Savings
Faucet aerators are one of the cheapest water saving devices on the market. For an investment as low as $2, faucet aerators and earth showerheads can reduce hot water usage by up to 50%.

Kitchen
It’s recommended that kitchen faucets use aerators with a flow rate of no less than 1.5 gpm, since kitchen faucets usually need high flow rates.

Bathroom
Bathroom faucets don’t need a high flow rate and will still maintain water pressure with a .5 – 1 gpm aerator.

Toilet Tank Bank
Fill the toilet tank bank with water and hang it on the inside of the tank wall. With just that simple install you’ll save 0.8 gallons of water per flush. There is nothing to maintain, it never needs re-filling, and it even prevents odors. The product doesn’t change how your toilet functions in any way; it just saves water.

Shower Timer
As much as 25 gallons of water can be used on a 15-minute shower. Curtail the water waste with shower timers. These water saving devices are a fun, smart, and cheap way to keep everyone in the household in line with water usage.

Types
There are different types of shower timers, ranging in price from super cheap to super expensive.

  • Sand Timer – These timers can be attached to the shower wall. Some are like a hourglass and some are digital. They’re usually made to keep track of 5-10 minutes and cost as little as $3.
  • Digital Shower Timer – An digital timer measures shower time in five-minute intervals. It is installed either with a suction cup or adhesive backing. At the beginning of a shower, a blue LED light appears, and at the 4.5 minute mark, the LED light changes to red. For the last 30 seconds, the red light on the LED shower timer flashes red as a reminder. The cost of this timer is approximately $7.
  •  Digital Shower Timer with Water Consumption Calculator – Costing about $15, a digital shower timer and water calculator displays the amount of time spent as well as the amount of water consumed during the shower. It allows you to set the target amount of water to be used, and an alarm sounds once that target has been reached. This timer also can be installed with a suction cup, or hung with a lanyard.

Soil Moisture Meter
For aspiring and expert gardeners alike, the name is self-explanatory; the meters measure soil for adequate moisture. Soil moisture meters are analog-style, and read the moisture levels in the soil to prevent over-watering, a leading cause in plant death.

Most of these water saving products pay for themselves in under a year, but save you money and decrease energy usage for much longer.

Group 1

How Does High Expansion Foam Differ from Low Expansion Foam?

High Expansion Foam vs. Low Expansion Foam

This blog has been updated from previous version published in 2014.

You may be considering using spray foam insulation in your home or commercial space but are unsure what type to use. High Expansion and Low Expansion Foam are the two primary types that are used. Here are the main differences between them.

Uses

Low expansion foam only expands about 10% larger than the output size, so it is used for smaller jobs like:

  • cracks and gaps around windows and doors too big for traditional caulk
  • plumbing, HVAC, and electrical penetrations
  • seams and small openings in framing

Because it expands as much as 5 times the output size, high expansion foam is primarily used for filling big voids, such as:

  • rim joists, roof/wall joints, or big gaps in framing
  • blind corners
  • wall/ceiling intersections
  • around boxes over can lights
  • Rim joists
  • Attics, basements, crawl spaces
  • Foundation walls
  • Stud cavities

Curing Method

High Expansion foam has two components stored in separate tanks until mixed at the time of spraying. After spraying, it typically cures in less than 2 minutes.

Low expansion foam comes in a single tank or container, and relies on moisture in the air to cure, usually in about 20 minutes. In extremely dry conditions, you may need to use a spritzer to properly cure this type of foam.

Dispensing Method

Since high expansion foam is used for larger jobs and requires separate tanks for the two components, the dispensing systems are typically larger and have two tanks, each with a line connected to the spray gun.

Low expansion foam is typically in smaller containers that can either attach directly to the spray gun or have a single line connecting to a separate, single tank.

Save

Group 1

Using an AirCycler Switch to Ventilate and Save

When you ventilate the bathroom, how often do you think about the amount of time that should be spent ventilating, or how much energy is being wasted by over-ventilating? If you’re like most people, these two issues have probably never really crossed your mind. The AirCycler Switch allows you to attack both of these problems simultaneously without a second thought.

AirCycler Switch
The AirCycler Switch controls both the light and fan

How Long Should I Run the Vent?
HVAC experts suggest that the bathroom fan operate the bathroom fan for no less than 15, and no more than 20 minutes after a shower or bath. By letting it run for this amount of time, the fan is able to exhaust the moisture out of the room. Running the fan longer also does this. It can however, waste a tremendous amount energy, leading to higher energy costs, and a higher carbon footprint. Operating the exhaust fan for less time can cause condensation problems such as molding and rotting. These can inflame respiratory-related health issues including asthma.

How Do I Set and Operate the AirCycler Switch?
This switch replaces both the light and fan switches in the bathroom. The settings on the switch are ventilation, delay, and the ability to cancel the delay. The timer switch uses a microprocessor, which watches and controls how long the fan operates. It does this in order to provide a specific amount of ventilation to the room.

  • Ventilation Setting – The number of minutes each hour you want the fan to operate.
  • Delay Setting – The amount of time the fan will run after the light has been turned off (this setting is great, as it allows the ventilation cycle to finish after the bathroom is no longer occupied).
  • Cancel Delay – Use this setting if you don’t want the fan to run after the light has been turned off. To activate this, simply turn the light back on again within a few seconds.

Once set, the microprocessor in the AirCycler Switch recognizes each of the settings and ventilates the bathroom accordingly. It does this by subtracting the delay time from the hourly ventilation time.

Take for example a situation where the hourly ventilation is set to 20 minutes, and the delay for 10 minutes. Someone spends 5 minutes in the bathroom (the ventilation runs during this time) and turns the light off when they leave. Afterward, the 10-minute delay kicks in, totaling 15 minutes the fan has operated for that hour. The microprocessor senses this and runs the fan for an additional 5 minutes over the course of that hour.

If during the course of an hour, the fan is operated for more than the 20 minutes that were initially set, the AirCycler will subtract that amount from 20 for the next hour of operation.

Limiting the amount of energy that is used (in many cases wasted) through bathroom ventilation provides you with more control over both the indoor air quality of the home as well as the amount of energy being consumed. Whenever there is less energy being used in the home, less money spent on energy bills is sure to follow.

low gwp spray foam

Understanding Low GWP Spray Foam

Spray foam insulation has been used to insulate both commercial and residential spaces for decades. This form of insulation traditionally contains blowing agents called hydrofluorocarbons (HFC), which allow the polyurethane to change from a solid into foam, providing the insulation with both its form and R-value. However, this heat trapping chemical also contributes to the depletion of the earth’s protective ozone layer. When insulating, low gwp spray foam provides the same quality of protection, without the added harmful emissions.

Measuring Global Warming Potential (GWP)

Across much of North America, regulators have introduced requirements to gradually eliminate HFCs, and limit their use, thus reducing their contribution to climate change. The measurement basis for these regulations is called Global Warming Potential (GWP). With carbon dioxide as the reference gas (assigned the number 1), researchers compare the impact different gasses have on the atmosphere. The higher the GWP number, the greater the possibility of a gas warming the earth in comparison to carbon dioxide.

Low GWP Spray Foam

While the HFCs in traditional spray foam lend to exceptional form and R-values, even a miniscule amount being released into the atmosphere can have significant consequences on the ozone layer, and rising sea levels to name a few. Low gwp spray foam provides the same excellent insulation without harmful HFCs. Not only does this foam meet changing government requirement, these foam systems also:

  • Deliver a consistent stream of polyurethane foam
  • Contain an R-Value of 6.6
  • Cure in approximately 1 hour
  • Great for sealing attic, crawl space, floors, ceiling, walls, and basement

Reducing the global warming potential of the substances we use in building projects will help reduce the impact we are having on our atmosphere. Contractors, home, and building owners can now feel confident when using low gwp foam to seal and insulate spaces.

Group 1

Tackle Water Demand with Water Saving Devices

The average family is wasting nearly 200 gallons of water every week through leaks, water you never even know is leaving.

Currently, 40 out of the 50 states in the US are expecting statewide water shortages within the next decade. Needless to say, we’re looking at a water crisis. To put this on a more personal scale, the average family is spending more than $1,000 annually on water bills. This doesn’t even include the amount being spent on water heating, or energy used to run appliances like the dishwasher or laundry machine. The simplest way to reduce this usage (and associated costs), is by installing items found in a water conservation kit

Shower

Water saving devices help save, at the very least, 20 percent more water in a home. Additionally, they tend to perform better than their non-efficient counterparts. For example, the eco showerhead in a water conservation kit uses only 1.5 gallons of water per minute. At the same time, it comes with 9 different spray options, and is self-cleaning. Replacing the showerhead can save enough water to amount to 88 loads of laundry. 

Faucet

The faucet is one place in the house where usage and waste are unfortunately easy to overlook. Leaving the faucet running for just 5 minutes can result in enough energy wasted to power a 60-watt light bulb. This waste also leads to 10 gallons of water literally gone down the drain. Installing faucet aerators drastically cuts down on this kind of waste to the tune of $250 over the lifetime of the aerator.

Toilet

The toilet happens to be one of the largest consumers of water in the entire home. A water conservation kit contains a few items to help combat this. Toilet Tank Banks are great water saving devices. It is installed in the toilet tank to reduce the amount of water used per flush. It does this without interfering with the toilet’s mechanics, and it prevents odors.

Without even realizing it, the average family is wasting nearly 200 gallons of water every week through leaks, water you never even know is leaving. This equals over 9,000 gallons yearly, enough water for 300 loads of laundry! The first step to solving this problem is discovering it. The toilet leak tablets that come in the water kit do just that. They change the color of the water if a leak is present. Another great tool for combatting toilet water waste is the tank bank.

Saving water at home doesn’t have to mean a complete shift in your lifestyle. A water conservation kit comes with a variety of everyday products that are not only simple to install, but can save thousands of gallons and dollars over their lifetimes.

Group 1

Conservation Kits Provide Instant Savings

As the climate crisis on our planet has become a climate emergency, a lot of us are looking for different ways to improve our carbon footprint. While this may initially seem like a daunting and expensive task, it truly isn’t. There are many small ways to start saving both energy and water around your home or building that won’t break the bank. Conservation kits are prepared with these types of savings in mind, and the items they contain provide instant savings once installed.

Improving Energy Efficiency

According to Time.com, “On average, remote workers have seen a $40-50 monthly increase in their energy costs—or as much as $600 a year.” With energy bills steadily on the rise, employing measures that can produce savings right away is even more pressing. Common items you’ll find in conservation kits include:

  • LED Light Bulbs, which use up to 80% less energy than their incandescent counterparts
  • Closed Cell Foam to limit drafts and heat from entering through doors
  • Outlet Gaskets that block air leaks from outlets
  • Rope caulk to seal air from entering through windows
tidy room filled with furnitures

Help Me Save Water

Each day, the average home in the United States uses approximately 80-100 gallons of water at home. A surprising number, right? When you consider the amount of times we wash our hands and dishes, flush the toilets, and even shower, this number really begins to take shape. Let’s take a step back, and see how we can bring this number down.

  • Low flow aerators reduce the amount (but not the pressure) of water coming from faucets. Their flow rates range from 0.5-2.0 gallons of water per minute.
  • Low flow shower heads follow this same concept, except with the shower. Many of these shower heads are also self-cleaning.
  • A toilet tank bank is placed in the toilet tank to limit the amount of water used per flush.
  • Outdoor water savers allow you to expand water savings outside of the home and into your gardens.

Saving energy and water at home, or in your building, can actually be quite simple. With a few quick installations of items found in conservation kits you can be well on your way to helping the climate and your wallet at the same time.

Group 1

Using A Green Loan for Home Efficiency

brown wooden table and chairs

“Creating a green home is a great way to reduce your carbon footprint right where you live, while at the same time placing money right back into your pocket.”

Our homes are responsible for approximately 20 percent of all greenhouse gas emissions in the US. While some may want to add energy saving upgrades, many have held back because of the costs. Adding energy and water efficiency products to your home or building just got a little bit easier. Using a green loan, you can easily get started on completing those projects that will increase the overall efficiency and savings in your space.

How does a green loan work?

This type of loan can be used to complete major renovations, such as installing tankless water heaters, solar panels and energy efficient doors and windows. Additionally, the funds can also be used to make faster green improvements, including:

  • Low-flow showerheads
  • Low-flow aerators
  • Eco toilets
  • LED lights
  • Adding or updating insulation
  • Programmable thermostats

When searching for products that meet energy and water efficiency requirements, look for the Energy Star and WaterSense labels.

How much can I save?

The products installed and projects completed with a green loan can certainly help lower your utility bills. At the highest level, LEED-certified homes can save an average of 15% on the cost of energy annually. Taking into account that the average family in the United States spends between $2,000-$3,100 on energy and water bills every year, that can equal savings of roughly $300-$465.

Creating a green home is a great way to reduce your carbon footprint right where you live, while at the same time placing money right back into your pocket. Check with your local bank or credit union to find out more information on getting started with one of these loans.

Group 1

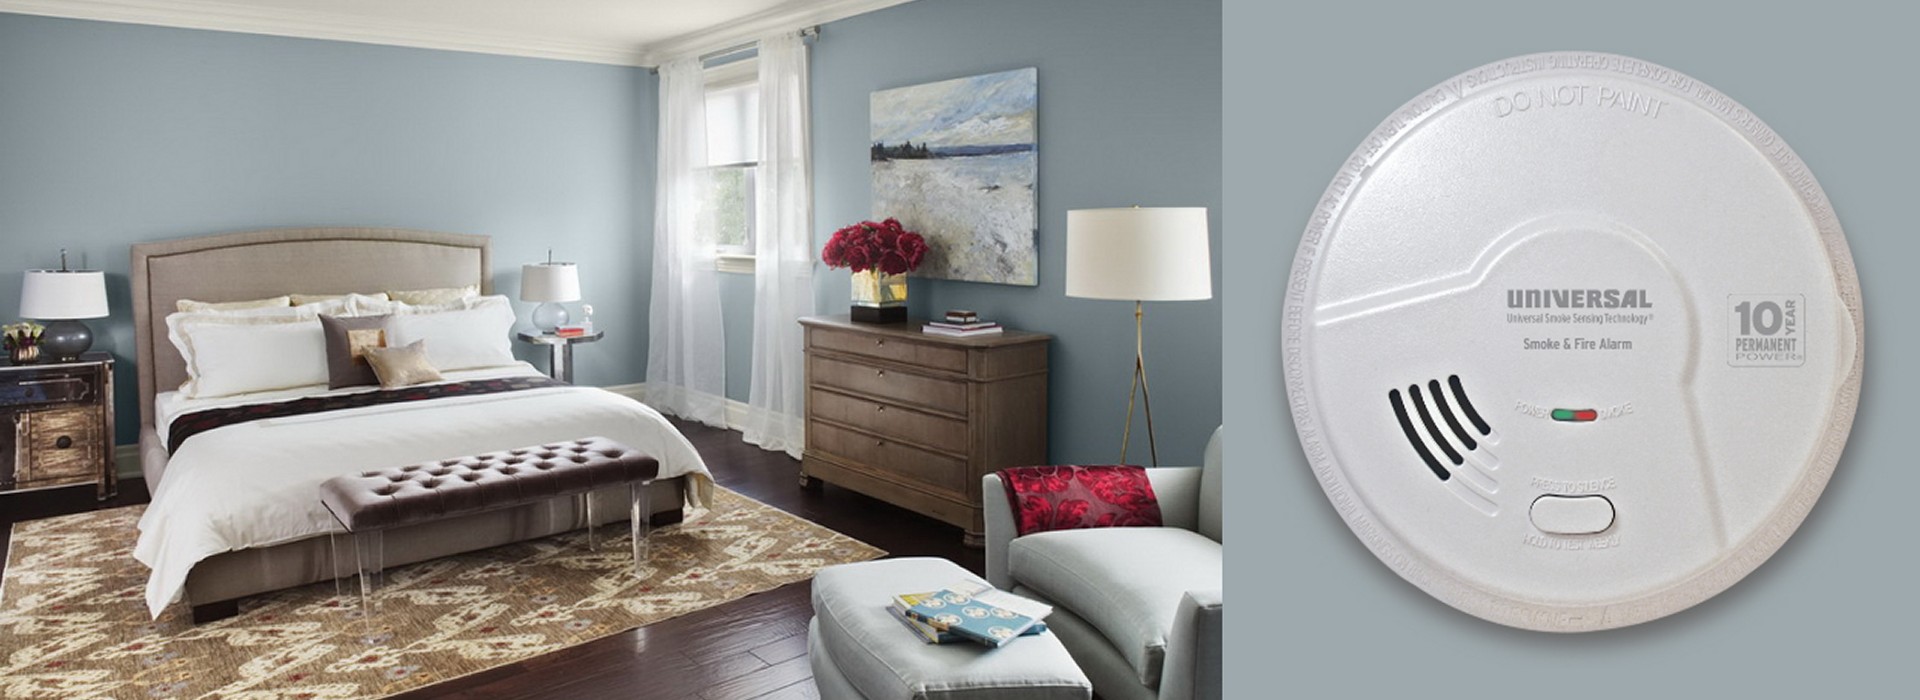
Protection With A Tamper Proof Smoke Detector

Having a safe home or building is a top priority, whether you’re ensuring the safety of your family home, or your commercial or industrial space. Installing the right equipment can go a long way in providing that necessary protection. In addition, it can provide you with a sense of comfort, knowing your space is properly secure. A tamper proof smoke detector is a great tool that supplies all this and more.

Setting up the Detector

One of the most important parts of installing a smoke and fire alarm is knowing where to place it. A smoke alarm is your first line of defense against such an emergency. It should be installed in a central location, and there should be at least one on every level of the home or building.

Detectors should be installed 20 feet (at the very least) from combustion appliances, such as ovens and furnaces, as well as those that burn fossil fuels, wood or other biomass.

Install the smoke detector at least 10 feet from areas that produce high levels of humidity, such as bathrooms and laundry rooms.

Measure out at least 3 feet of space between the detector and heat/AC ventilation.

Replacing the Detector

The National Fire Protection Association (NFPA) suggests that smoke alarms in homes be replaced after 10 years. A tamper proof smoke detector has you covered in that the warranty lasts for 10 years. From installation to replacement, should issues arise with the alarm, you can take comfort in knowing it will be covered without additional out of pocket cost. Make it a habit to test detectors weekly to ensure all parts are working properly.

A dependable smoke detector is an essential tool to have in place in the case of an emergency. This device can help you feel both prepared and confident in the safety of your space.