Group 1

Conservation Kits Provide Instant Savings

As the climate crisis on our planet has become a climate emergency, a lot of us are looking for different ways to improve our carbon footprint. While this may initially seem like a daunting and expensive task, it truly isn’t. There are many small ways to start saving both energy and water around your home or building that won’t break the bank. Conservation kits are prepared with these types of savings in mind, and the items they contain provide instant savings once installed.

Improving Energy Efficiency

According to Time.com, “On average, remote workers have seen a $40-50 monthly increase in their energy costs—or as much as $600 a year.” With energy bills steadily on the rise, employing measures that can produce savings right away is even more pressing. Common items you’ll find in conservation kits include:

  • LED Light Bulbs, which use up to 80% less energy than their incandescent counterparts
  • Closed Cell Foam to limit drafts and heat from entering through doors
  • Outlet Gaskets that block air leaks from outlets
  • Rope caulk to seal air from entering through windows
tidy room filled with furnitures

Help Me Save Water

Each day, the average home in the United States uses approximately 80-100 gallons of water at home. A surprising number, right? When you consider the amount of times we wash our hands and dishes, flush the toilets, and even shower, this number really begins to take shape. Let’s take a step back, and see how we can bring this number down.

  • Low flow aerators reduce the amount (but not the pressure) of water coming from faucets. Their flow rates range from 0.5-2.0 gallons of water per minute.
  • Low flow shower heads follow this same concept, except with the shower. Many of these shower heads are also self-cleaning.
  • A toilet tank bank is placed in the toilet tank to limit the amount of water used per flush.
  • Outdoor water savers allow you to expand water savings outside of the home and into your gardens.

Saving energy and water at home, or in your building, can actually be quite simple. With a few quick installations of items found in conservation kits you can be well on your way to helping the climate and your wallet at the same time.

Group 1

4 Tools in Energy Efficiency Kits That Also Keep You Warm

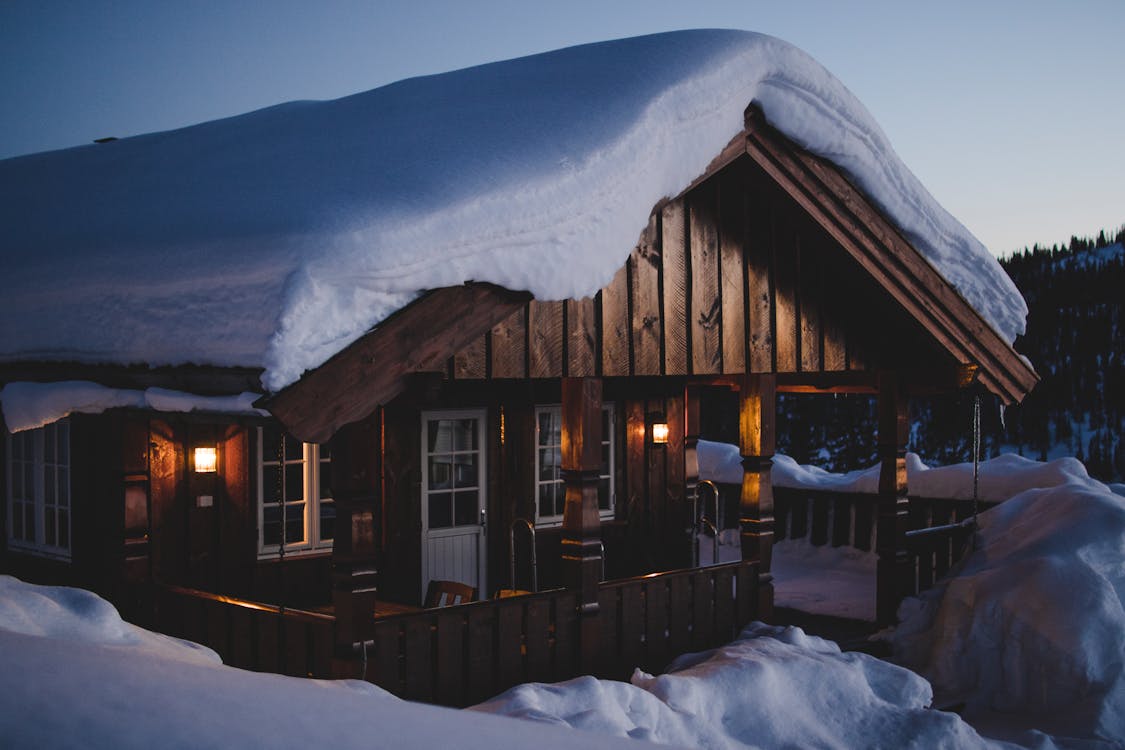
Brown Wooden House during Snow

With the changing seasons, a lot of us find ourselves playing the temperature game with the thermostat. This constant battle not only wreaks havoc on the energy usage, but the bills as well. Keep things warm inside, and the chill on the outside with energy efficiency kits. These kits – like a swiss army knife for combating drafts – are packed with supplies that properly insulate doors, windows, and other unintentional air entryways.

Foam Switch Gaskets, Outlet Gaskets, and Child Safety Caps

Unless every outlet is in use all the time (and I hope not, cause phantom energy loss can account for 5% of your home’s energy usage), those tiny slits in the wall are letting outside air slowly creep into your home. Along with outlets, the surrounding area behind the outlet and light switch plates also offer a way in for air. These leaks make the house colder than it should be and can cause energy loss of up to 20%.

Plastic Window Kit

Windows can let air in even when closed, but cold weather also makes them vulnerable to frost build-up and condensation. Plastic window kits, also known as shrink and seal window kits or window insulation kits, are installed over the entire window to provide airtight insulation from outside air. Kits are installed from the inside, and require a hair dryer (or some form of blowing heat) to “shrink and seal” film over the window. This method of insulation works on any type of window, is easy on the budget, and can increase R-Value (insulation level) by up to 90%.

Rope Caulk

Nearly every energy conservation kit features rope caulk, a substance is so easy to install a 5-year old could do it (we’re not kidding, just watch). Rope caulk is primarily used to combat cracks, gaps, and openings of every kind. Simply clean the area being sealed (remove dust, dirt, etc.), peel of the amount needed, and stick it into the open area. I think of it as 2-minute insulation.

The benefits of rope caulk don’t stop at insulation:

  • It’s cheap!
  • It’s durable through most weather conditions, so you don’t have to worry about it cracking during cold months
  • Just as easy as it is to install is how easy it is to remove (and clean up after), making this an easy insulation answer for renters

Door and Window Foam Tape

Foam tape is best used with sliding or swinging doors and windows. The tape blocks outside air by sealing the open space between the edges/side of doors and windows. Foam tape installs easily and is very cost effective.

Putting energy efficiency kits to good use – the gaskets, child safety caps, plastic window kits, rope caulk, and foam tape – will go a long way towards stabilizing the temperature in your home, saving energy and preventing energy loss, and allow you to subtract a few dollars from that energy bill.

Group 1

Cost Effective and Easy to Install Weatherization Options

To prevent cold air from entering your home during winter, and hot air from flowing in during summer, you need to close up the gaps in your windows to create a tight seal.

Not only will your home feel more comfortable, you will also lower your monthly energy costs with these inexpensive window weatherization tools.

Rope Caulk

Caulking is a method of weatherstripping that targets the crack, gap, hole, or opening that allows air to seep through. Basically it’s like sticking silly putty in the exposed area to seal it off. However, rope caulk provides a better stick, can weatherproof windows in any weather condition, and blends in with your decor. rope tape

Installation:

  • Clean, clean, clean the area where caulk will be used.
  • Peel of a lay of the rope caulk “beads” and divide it based on how much you need.
  • Press to seal.

Foam Tape

Foam tape is used to seal windows that slide or swing. It sticks to the edges or bottoms of windows to prevent air leakage when windows are closed.

Installation: Foam tape is easy to install and at less than $3 it is an inexpensive weatherization solution.foam tape

  • First, clean and dry the area  where the tape will be applied. If the area is dirty, wet, and/or cold, the tape won’t stick properly or it will easily loose its stickiness factor. It must be more than 40 degrees Fahrenheit.
  • Cut the amount of foam tape needed based on the length of window sides/bottom.
  • Remove the adhesive backing then press the tape into place to cover the area in need of sealing.

Shrink and Seal Window Kit

If you have scissors, a blow dryer, and $4 you can easily weatherproof windows with a Shrink and Seal Window kit. This kit will seal the whole window from the inside and increase the R-value, or insulating power, of the window by as much as 90%.

Installation: window kit

  • Again, you need to clean and dry the area before applying any sealing. You should also clean the insides of windows because you won’t be able to clean that area again until you remove the shrink film.
  • Cut the amount of shrink film needed. Cut enough film to cover the entire window (including some of the frame area).
  • Remove the backing from one side of the two-sided tape and stick it to the top, bottom, and sides of the window. After installing the tape, remove the adhesive backing from the other side.
  • Apply the shrink film around the window, gently stretching it as you work your way from one corner of the window to the other.
  • With the blow dryer on the highest setting, slowly move the dryer across the film to tighten it over the window. Don’t stand too close to the window while doing this, otherwise you’ll melt the shrink film.
  • Trim any film that’s left over.

Save

Save

Save

Group 1

DIY Air Conditioner Covers Can Lead to Big Savings

When summer is over, the window air conditioner is a gateway for cold air to come into the home and for warm air to escape. If you prefer to leave your air conditioner in the window, rather than lifting it out and storing it for the winter, you will want a cover that fits snugly over the unit to protect against air leaks.

There are a wide range of creative options like these:


air conditioner coversHowever, if you don’t have a lot of time for a big DIY project, you can purchase an attractive fabric window ac cover for less than $15.

Made in the USA, Endraft air conditioner covers are a beige, washable poly/cotton fabric and come with a 100% wind blocking liner, a roll of removable vinyl tape and a set of installation instructions. Endraft is unconditionally guaranteed to stop all cold drafts, dirt, and allergens that blow through idle room air conditioners.

air conditioner cover beige

With its high energy efficient insulating qualities, Endraft replaces non-insulating outdoor covers and can lengthen the life of an air conditioner. Exterior covers used alone cut off air circulation and trap the indoor heat. The heat then collides with the cold outside air and can cause condensation, rust, and damage.

Endraft has been tested by an independent laboratory, CON EDISON, and the LONG ISLAND LIGHTING CO., and its use has been suggested to many utility customers as a major way to reduce overhead. CON EDISON told one large cooperative complex in New York City that if it covered all of its room air conditioners with Endraft, it would save $70,000 per year in heating bills!

This easy and inexpensive DIY weekend project will save you a noticeable amount of energy and money each winter.

Save

Group 1

Plastic Storm Window Kits vs. Plastic Shrink and Seal Window Kits

Weatherproof Windows

Weather proofing your windows is key to maintaining both a comfortable and energy efficient home in the coming winter months. But as you sit huddled in your overstuffed arm chair, bundled in blankets, trying to escape the chilly draft sneaking its way into your home, you may find yourself wondering where to begin. Plastic Storm Window Kits and Plastic Shrink and Seal Window Kits each offer their own pros and cons. But before you make your choice, let’s see how the two stack up in factors of cost, time, investment, and reuse.

Think of the weather proofing of your windows like buying a new winter coat. You can buy the bargain coat and it will do the job, but you’ll probably find yourself purchasing a new one as next winter approaches. Invest in a sturdier, slightly more costly coat and it will last you countless winters to come. Plastic Shrink and Seal Window Kits are the bargain buy of window weatherization. These offer a lower price than their counterpart, but only a single season of sealed windows. These kits come in the form of a plastic film that covers the windows surface, eliminating drafts, energy loss, and frost build-up. With just a little bit of trimming and a common household hair dryer, you’ll increase the R-value of your windows up to 90%. That’s more thermal resistance, for just a few dollars and a few minutes of installation time. If you’re looking for a quick fix at a low price, Plastic Shrink and Seal Window Kits may be the product for you.

Plastic Storm Window Kits are the investment winter coats of window weatherization. They’re slightly more costly upfront, but can be used for more than just the current chilly season. This kit includes a plastic spline and a channel system to produce the seal in the front of the window. Because of this process, the installation time is a bit more involved than for the speedy, bargain option. But with that comes the ability for them to be reused. With an investment of your time and money, you’ll be well on your way to saving anywhere from 10% to 15% on your energy bills. Because Plastic Storm Window Kits are sturdier than their Shrink and Seal counterparts, you’ll be able to enjoy their benefits for many winters to come.

Just like picking out a new winter coat, the choice between the Shrink and Seal versus the Plastic Storm Window kits is a matter of preference. Whether you’re in the market for a one season bargain or a pricier investment, you can rest assured, warm and comfortably, that your home will be more energy efficient. You’ll feel the difference!

Group 1

5 Cost Effective Ways to Weatherproof Windows

Weatherproof Windows

Cold weather can be fun when skiing, having snowball fights, and using your garbage can lid as a makeshift sled, but none of those activities occur inside the home. Air leaks, gaps, cracks (or however you want to see them) in your window sneak outside weather into your home and lead to higher fees onto your energy bill. Keep drafts at bay and your monthly energy costs low by using one or more of these inexpensive tools to weatherproof windows.

Foam Tape

Foam tape is usually used to seal windows that slide or swing. It works just as the name would suggest, sticking to the edges or bottoms of windows to prevent air leakage when windows are closed.

Installation: At less than $3, not only is foam tape a fairly cheap weatherization solution, it’s easy to install.

  • First, clean and dry the area (must be more than 40 degrees Fahrenheit) where the tape will be applied. If the area is dirty, wet, and/or cold, the tape won’t stick properly or it will easily loose its stickiness factor.
  • Cut the amount of foam tape needed based on the length of window sides/bottom.
  • Remove the adhesive backing then press the tape into place to cover the area in need of sealing.

Shrink and Seal Window Kit

If you have scissors, a blow dryer, and $4 you can easily weatherproof windows with a Shrink and Seal Window kit. This kit will seal the whole window from the inside and increase the R-value, or insulating power, of the window by as much as 90%.

Installation:

  • As always, clean and dry the area before applying any sealing. You should also clean the insides of windows because you won’t be able to clean that area again until you remove the shrink film.
  • Cut the amount of shrink film needed. Cut enough film to cover the entire window (including some of the frame area).
  • Remove the backing from one side of the two-sided tape and stick it to the top, bottom, and sides of the window. After installing the tape, remove the adhesive backing from the other side.
  • Apply the shrink film around the window, gently stretching it as you work your way from one corner of the window to the other.
  • With the blow dryer on the highest setting, slowly move the dryer across the film to tighten it over the window. Don’t stand too close to the window while doing this, otherwise you’ll melt the shrink film.
  • Trim any film that’s left over.

V Seal Weatherstrip

The V Seal Weatherstrip, which is much like tape, is another $4 tool that allows a hassle-free installation and removal.

Installation:

  • Clean, measure, then cut as always. Clean the area. Measure how much V Seal strip is needed then cut away.
  • Bend the strip down the marked center line to create a “V” shape.
  • To seal, remove the backing and press the V strip into the corner of the window.

Rope Caulk

Caulking is a method of weatherstripping that targets the crack, gap, hole, or opening that allows air to seep through. Basically it’s like sticking silly putty in the exposed area to seal it off. However, unlike silly putty rope caulk provides a better stick, can weatherproof windows in an weather condition, and is a lot more pleasing aesthetically (unlike your lime green putty).

Installation:

  • Clean, clean, clean the area where caulk will be used.
  • Peel of a lay of the rope caulk “beads” and divide it based on how much you need.
  • Press to seal.

Window AC Cover

Though it’s easily overlooked, your window AC unit could be a major player in the game of air leakage. Window AC covers are often placed on the outside of inside units, but those covers only protect the unit from wind and rain. Installing window AC covers indoors will give your unit added protection by stopping air leaks.

Installation:
Tape the insulation liners to the face of the air conditioner and place the fabric cover over the windblock liner and air conditioner. Before you purchase an AC cover, measure the air conditioning unit because covers come in three different sizes.

With weatherproofed windows you can still enjoy skiing, snowball fights, and garbage lid sleds without the threat of winter weather becoming household guests.

Save

Group 1

Savings and Staying Warm with Window Air Conditioner Covers

Window Air Conditioner Cover

Air conditioners can be a gift from the heavens during sticky summer months, but as the seasons roll into cooler weather, those same air conditioners are a silent source of energy and monetary waste. Prevent energy loss, lower your heating/cooling costs, and protect the quality of your AC unit with window air conditioner covers.

Prevent Energy Loss

AC units get a much deserved break during cold months, but even when turned off they can still use up much energy. Uncovered air conditioners allow the cold outside air, dirt, dust, and other undesirables to enter the home and mix in with the warm air the heater provides. This creates an uncomfortable, inconsistent temperature throughout the house – some rooms are too hot, others too cold, and if you’re lucky at least one room will be just right. Air conditioner covers prevent energy loss by blocking the flow of air into and out of your home.

Energy loss does not only affect the house – it can be a drain on the energy bill as well.

Stop Money From Pouring Down the Drain (or flying through the air conditioner)

How much of your energy bill do you think is due to heating and cooling alone – under or over 20%? Believe it or not, 43% of your energy bill is devoted to keeping the house warm or cool. Along with other insulation solutions, you can erase 20% or more off energy costs with window air conditioner covers. When installed properly, AC covers keep the unit from acting as a source for air leaks.

Though less energy waste is the ultimate reason to use AC covers, it is not the only one. AC units also need protection from damages.

Protect The AC Unit From Damages

Overly heated rooms mixed in with the cold air coming through the AC can cause dampness, which leads to mold and mildew. Removing the mold and mildew will require one of three options:

  • Go through a lengthy process to remove the mold and mildew yourself
  • Hire a professional for the removal
  • Get a new unit (not recommended)

While it’s less pricey to do it yourself, the process takes a while and calls for removal of some parts in order to reach moldy areas. Window air conditioner covers are waterproof, making it easy to protect the air conditioner (and your health) from damages. Plus, the only manual labor involved will be installing the cover.

How to Install Window AC Covers

Even the less crafty of us can install an AC cover. All you need to provide is measuring tape because cover packages come with rest: fabric cover, plastic waterproof sheets, adhesive tape to secure the cover, and instructions.

Measure your AC unit to ensure that you purchase the right size for your air conditioner then follow the instructions for the cover.

No longer do cold weather months have to wreak havoc on your AC unit. Stop the energy waste, the sapping of your money, and the discomfort in your home by installing air conditioner covers.

Group 1

Stay Warm and Save with Window Air Conditioner Covers

Window Air Conditioner Covers
Window Air Conditioner Cover

During the hotter months of the year, there is often nothing more comforting than knowing you have a working air conditioning unit. If this unit is of the indoor wall variety, that comfort can easily become an annoyance as cold weather sets in. Drafts can easily enter the home through these units, which not only causes heat loss and discomfort, but raises energy bills as well. Installing window air conditioner covers helps you stay warm and save money on energy this winter.

How the Covers Work

Window air conditioner covers come with a fabric cover, waterproof sheets (windblock liners), and a roll of tape. The fabric has an insulating fiber on the inside, and is designed to fit perfectly over the unit. The sheets are taped to the unit to protect the seal from inclement weather conditions and keep the air waterproof. In addition, this layer prevents cold air from coming into the room through the air conditioner. In doing so, the insulation is saving energy, by reducing the amount of energy the heating unit requires to warm the home up. In turn, this leads to savings on energy costs.

Choosing the Right Size

Indoor air conditioners come in a variety of sizes, and so do covers. Before purchasing a cover be sure to measure your wall air conditioner. There are three different size air conditioner covers, and they allow about 1″ of give for each unit:

  • Small: From 12″ x 14″ in height and 18″ to 21″ in width
  • Medium: From 15″ to 17″ in height and from 22″ to 25″ in width
  • Large: From 18″ to 20″ in height and from 26″ to 28″ in width

Installing Window AC Covers

All you need to install window air conditioner covers besides the items they come with is a pair of scissors. Important to keep in mind is that the tape holds best when the temperature outdoors is above 35°F.

  1. Unplug the air conditioner and wrap the electric cord as tightly around the front edge of the unit as possible. Hold it in place using a 3″ piece of tape.
  2. Measure the width and height of the unit, adding 6″ to each measurement. This is the measurement you will use when cutting (with scissors) the windblock liners.
  3. Place the windblock liner over the front of the air conditioner, allowing it to overlap by 3″ on each side. For the best results, make sure the windblock also covers the electric cord, plug, and the place on the unit where the cord exits.
  4. Fold and tape square corners, then use the tape to hold the complete edge of the liner to the unit. Make sure that the tap overlaps so half is attached to the liner, and half is attached to the air conditioner.
  5. Place the fabric cover over the air conditioner.


By insulating the window AC unit, there will be less outdoor air interfering with the temperatures inside the home. Limiting the places where drafts can enter the home results in gaining more control over home temperatures, reducing the amount of energy and heat lost, and spending less money to keep yourself and your loved ones warm this winter.

Group 1

Keep Cold Air Out and Warm Air In with Plastic Windows

Plastic Windows
Plastic Windows

As the year draws to a close, people are planning various parties, decorating their homes, and coming up with resolutions they’re sure to break within the first few months of the new year. It also happens to be during this time of the year that many see a dramatic increase in the amount of money paid for energy, specifically for heating. This is due largely to poor insulation, which allows the air from outside to make its way into the home. One of the simplest and most cost-effective ways to reduce this problem is by installing plastic windows.

Keeping Cold Air Out
Windows make up anywhere from 10 percent to 25 percent of home heat and energy loss. You may be wondering how an item that sounds as simple as a plastic window could possibly eliminate this loss, or even lower the amount. The plastic film is also an insulating film. When correctly installed over the face of the window, it blocks cold air from entering the home through windows, which will also stop the warmer air from leaving.

Types of Plastic Windows
Plastic windows, also referred to as interior storm windows, come in two different styles: those with channeling, and those without.

Channeling: This type of interior storm window comes with plastic channeling, clear film, and adhesive. The channeling coupled with the plastic gives the appearance of placing a new window frame over the existing one.

Without Channeling: Storm windows without channeling include only the insulating plastic and a roll of tape. Although it has less components than the windows with channeling, it has more steps for installation.

Both types are also cost-effective. Storm windows without the channeling cost approximately $3 to $6, while storm windows with channeling are valued at $9 to $15. They are available for a variety of window sizes, so be sure to take measurements before making a purchase.

Installing Storm Windows
Installation of the window kit with channeling can be completed in a few simple steps:

  1. Attach plastic channels around the frame of the window.
  2. Over the face of the window, spread the plastic insulation film.
  3. Using the thin plastic strip (the spline), hold the plastic in place, and lock it into the channel.
  4. Trim the channels and spline if necessary using a utility knife. The plastic film can be trimmed with scissors.

Installing plastic windows without channeling can be completed by doing the following:

  1. Clean around the window surface’s edge, and allow it to dry.
  2. After a 10-minute wait, place the tape around the edges
  3. Cut the plastic film in a way that allows there to be a 2-inch overlap on either side of the window.
  4. At the top of the window, press the plastic against the tape lightly, and gently stretch and press the film at the bottom. Carefully repeat this along the sides.
  5. Once set, press the plastic film firmly against the tape.
  6. Using the highest setting on a hair dryer, pass it over the film. Make sure the dryer is being used at a 1″ distance, and never comes in contact with the plastic.
  7. The film should shrink until all wrinkles appear.
  8. Trim away any excess film with scissors.


Once the window insulation has been installed, you won’t have to worry about cold air coming in through your windows while heated air leaks out. Also, with 10-25 percent of heat loss eliminated from energy costs, the fear of higher energy bills this winter will also be pushed to the back of your mind.

Group 1

3 Easily Installed Weatherization Supplies for Windows

Weatherization Supplies

It might be days before Halloween, but already there’s a chill in the air. Prevent that chill from becoming an unwelcome guest in your home by sealing up your windows. Follow these simple steps to install weatherization supplies like rope caulk, V-seal weatherstrip, and Shrink and Seal window kits and you’ll provide an instant sealing benefit to the windows in your home.

Installing Rope Caulk

  1. Clean: For the rope caulk to achieve its maximum level of stickiness, clean up the surface of the area where you’ll install it. Dirt, grease, moisture, and even old pieces of caulk should be cleared up if you want the rope caulk to seal effectively.
  2. Peel: Carefully peel off the top layer of rope caulk “beads.” Separate each bead, or individual cord of rope caulk, according to the width you need.
  3. Press to Seal: Firmly press the caulk into any cracks, gaps, and openings to seal them up.

Bonus use of rope caulk: Aside from being easy to install, rope caulk is easy to clean up, leaves no mess, and it stays durable in any weather condition.

Installing a V-Seal Weatherstrip

  1. Clean: As with many weatherization supplies, you need to clean the area where you’ll install the V-seal weatherstrip. Measure, Then Cut: Measure the length of the window you’re sealing. Then, cut the amount of V-seal needed.
  2. Shape: The V-seal weatherstrip has a seam running down the middle to help you easily create the “V” shape for installation. Just fold the strip vertically right down the marked line.
  3. Peel and Seal: Peel off the the V-seal’s adhesive backing. Press the V-seal into the corner of the window to seal.

Installing a Shrink and Seal Window Kit
Seal your entire window with a Shrink and Seal window kit.

  1. Clean: I really can’t stress enough about the importance of this. Clean the area where you plan to install the Shrink and Seal window kit. It’s also useful to wash the insides of the window since you won’t be able to wash them again until you remove the shrink-film.
  2. Cut Shrink Film: Hold up the shrink-film over the entire window to see how much film you’ll need to seal it off (part of window frame included). Cut the amount desired.
  3. Install two-sided tape: Remove one side of the tape and place it on window sides, top, and bottom. Then, once you’ve installed the tape, remove the the backing from the other side.
  4. Installing shrink-film: It’s easier to work with the shrink film if you start from one corner then work your way around. Gently stretch the film as you apply it to each corner of the tape.
  5. Tighten the film: Put your blow dryer on the highest setting. Standing a few inches away from the window, move your dryer back and forth, up and down, and diagonally across the shrink-film to make it tighter. Don’t keep the dryer on one area for too long because the plastic will melt if too much heat is applied to it.
  6. Cut: If needed, cut away any excess shrink-film.

Each one of these weatherization supplies comes with a different set of instructions, but all will help to properly insulate your home, decrease your energy usage, and save you hundreds (and then some) off your energy bill.