Group 1

Plastic Storm Window Kits vs. Plastic Shrink and Seal Window Kits

Weatherproof Windows

Weather proofing your windows is key to maintaining both a comfortable and energy efficient home in the coming winter months. But as you sit huddled in your overstuffed arm chair, bundled in blankets, trying to escape the chilly draft sneaking its way into your home, you may find yourself wondering where to begin. Plastic Storm Window Kits and Plastic Shrink and Seal Window Kits each offer their own pros and cons. But before you make your choice, let’s see how the two stack up in factors of cost, time, investment, and reuse.

Think of the weather proofing of your windows like buying a new winter coat. You can buy the bargain coat and it will do the job, but you’ll probably find yourself purchasing a new one as next winter approaches. Invest in a sturdier, slightly more costly coat and it will last you countless winters to come. Plastic Shrink and Seal Window Kits are the bargain buy of window weatherization. These offer a lower price than their counterpart, but only a single season of sealed windows. These kits come in the form of a plastic film that covers the windows surface, eliminating drafts, energy loss, and frost build-up. With just a little bit of trimming and a common household hair dryer, you’ll increase the R-value of your windows up to 90%. That’s more thermal resistance, for just a few dollars and a few minutes of installation time. If you’re looking for a quick fix at a low price, Plastic Shrink and Seal Window Kits may be the product for you.

Plastic Storm Window Kits are the investment winter coats of window weatherization. They’re slightly more costly upfront, but can be used for more than just the current chilly season. This kit includes a plastic spline and a channel system to produce the seal in the front of the window. Because of this process, the installation time is a bit more involved than for the speedy, bargain option. But with that comes the ability for them to be reused. With an investment of your time and money, you’ll be well on your way to saving anywhere from 10% to 15% on your energy bills. Because Plastic Storm Window Kits are sturdier than their Shrink and Seal counterparts, you’ll be able to enjoy their benefits for many winters to come.

Just like picking out a new winter coat, the choice between the Shrink and Seal versus the Plastic Storm Window kits is a matter of preference. Whether you’re in the market for a one season bargain or a pricier investment, you can rest assured, warm and comfortably, that your home will be more energy efficient. You’ll feel the difference!

Group 1

DIY Insulation: Closed Cell Spray Foam Kits

Closed Cell Spray Foam Kits

If you live in North America, you’re probably experiencing record breaking cold temperatures this year. Related to that, you’re probably also seeing shocking energy bills. Lack of insulation is the main cause of high energy usage in homes and buildings. Spaces that don’t have insulation are the main trouble spots for loss of heat in the winter and also gain of heat in the summer. So, do you hire an insulation contractor and shell out thousands of dollars? A good low-cost solution to insulating your home is via Do-It-Yourself Closed Cell Spray Foam Kits.

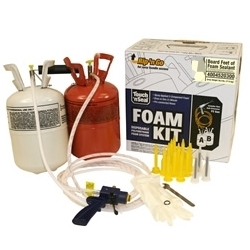
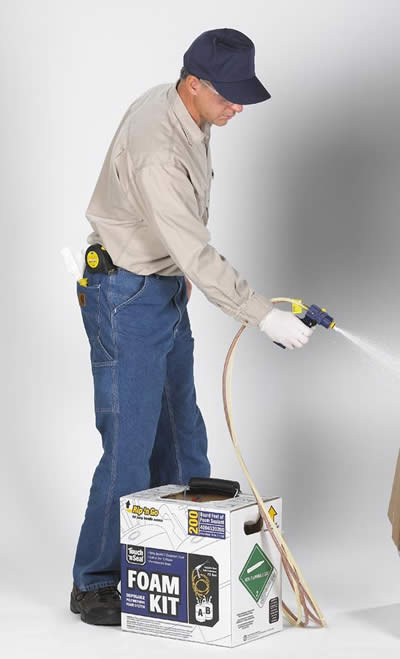
A spray foam kit comes with everything you need to insulate those trouble spots in your home or building. It contains a dispensing gun hose assembly as well as cones and nozzles to provide more control over the way it is sprayed. There are 2 types of spray foam available: closed cell and open cell. In closed cell foam, the cells of the chemical are closed and hence have a rigid and denser structure. Open cell foam by contrast has a more open cell structure and therefore has a more sponge like texture. As a result, closed cell foam has a higher R value than open cell foam. Another difference is closed cell foam acts as an air and water vapor barrier, whilst open cell foam is only suitable as an air barrier. Therefore, open cell foam is not recommended for use outside.

Closed Cell Spray Foam is very useful for insulating places such as: garages, rafters, walls and floors as well as roofing and outdoor projects. DIY Spray Foam Insulation comes variety of sizes such as 600, 200 and 15 Board Foot. Board foot just means that one 600 board foot kit will cover a 600 square foot area with 1 inch of foam. So, whether you need to insulate a whole wall in your basement, or you just need to insulate a small area, there is spray foam size for your need. Another advantage of closed cell foam is that it comes in a Fire-Retardant formula. This is useful because some city codes require insulation to have fire retardant formulas.

So if you’re looking for a low cost, do it yourself solution for insulating those cold areas of your home, Closed Cell Spray Foam is a great option. And if you’re unsure if you’re up to the task, there are plenty of instructional guides and videos available to help you.

Save

Save

Save

Save

Save

Group 1

Understanding the Types of DIY Foam Insulation

DIY Foam Insulation
DIY Foam Insulation

You don’t need to be a conservation specialist to understand foam insulation; more importantly you don’t need expert knowledge to install it. Whether sealing large areas, small areas, or openings in-between, understanding the types of DIY spray on insulation will go a long way towards raising the comfort level in your home.

R-Value and What it Means for Foam Insulation

Insulation material needs to resist heat to be effective: this is R-value. R value is measured based on the density, thickness, and type of material (spray foam) and it tells us if the material holds a high or low amount of thermal resistance. Both types of foam, closed and open cell, offer different R-values and benefits for insulation.

Closed cell foam

The cells in closed cell foam are packed tightly together, so it insulates better. Because the cells are packed so tightly, the foam also has a high resistance to heat and water – meaning that is boasts a high R-value. Though the R-value is high, over time that number can decrease.

Closed cell, or high expansion foam, better insulates large areas like attics, basements, and garages. FYI: A little goes a long way with high expansion DIY foam insulation – spray only 1″ of this to see it expand 30x.

Open cell foam

The cells in open cell, or low expansion spray foam are loosely packed, and the R-value is lower, but – installed in the right place – this is not a disadvantage for insulation. Open cell foam works as an air barrier, and unlike closed cell foam the R-value of open cell foam will not change over time.

Low expansion DIY spray on insulation expands by only 10% of the initial spray size, so it’s best used in small areas, like cracks and gaps in floors, walls, windows, etc.

It only takes a little information, the right type of foam, and the right amount to properly insulate your home.

Save

Save

Group 1

Finding the Right Door Sweep for Your Home

Exterior Door SweepWith or without a security system, intruders can enter your home through a closed door – but not the kind you have in mind. Dust, cold air, bugs, and more use the open spaces between door bottoms to become a mainstay in your house. Protect your energy bill from bloat by installing a standard, foam, self-stick, or automatic exterior door sweep.

Standard Door Sweeps

Install a standard sweep on doors that cross wooden, tiled, or smooth floors of any kind. Standard sweeps need to be screwed into the bottom of a wooden or steel door, but a little labor is worth the benefit. They seal saps as large as 3/4ths of an inch and have a long lifespan, lasting for years at a time. The most common size is a 36 inch door sweep but you may need a 42 inch door sweep.

Foam Door Sweeps

Renters rejoice! Foam door sweeps install without any screws whatsoever and work on doors that cross nearly any type flooring: carpet, tile, wood, and more. This exterior door sweep comes with two tubes and a connected pocket, or sleeve, for each tube. Simply slide one tube into each sleeve and slip it under the door.

Self-Stick Door Sweeps

If you can peel a sticker you can install a self-stick door sweep. Peel the adhesive from the backing and stick it to the bottom of the door. This type of door sweep works best on metal and wood doors, but regardless of the door you’ll have weatherproof, dust-proof, bug-proof and hassle-free insulation with self-stick sweeps.

Automatic Door Sweeps

Carpeted areas or doors that cross over rugs will get the most benefit out of automatic door sweeps. This exterior door sweep was designed to rise just enough to cross the carpeted area but still seal firmly when the door is closed. A little more install work is required here, with screws and a “roller” (plug), but these sweeps seal up to 1/2″ of space between the door and threshold.

Get proactive in your home’s energy security (along with your finances) by investing in door sweeps.

Save

Group 1

5 Cost Effective Ways to Weatherproof Windows

Weatherproof Windows

Cold weather can be fun when skiing, having snowball fights, and using your garbage can lid as a makeshift sled, but none of those activities occur inside the home. Air leaks, gaps, cracks (or however you want to see them) in your window sneak outside weather into your home and lead to higher fees onto your energy bill. Keep drafts at bay and your monthly energy costs low by using one or more of these inexpensive tools to weatherproof windows.

Foam Tape

Foam tape is usually used to seal windows that slide or swing. It works just as the name would suggest, sticking to the edges or bottoms of windows to prevent air leakage when windows are closed.

Installation: At less than $3, not only is foam tape a fairly cheap weatherization solution, it’s easy to install.

  • First, clean and dry the area (must be more than 40 degrees Fahrenheit) where the tape will be applied. If the area is dirty, wet, and/or cold, the tape won’t stick properly or it will easily loose its stickiness factor.
  • Cut the amount of foam tape needed based on the length of window sides/bottom.
  • Remove the adhesive backing then press the tape into place to cover the area in need of sealing.

Shrink and Seal Window Kit

If you have scissors, a blow dryer, and $4 you can easily weatherproof windows with a Shrink and Seal Window kit. This kit will seal the whole window from the inside and increase the R-value, or insulating power, of the window by as much as 90%.

Installation:

  • As always, clean and dry the area before applying any sealing. You should also clean the insides of windows because you won’t be able to clean that area again until you remove the shrink film.
  • Cut the amount of shrink film needed. Cut enough film to cover the entire window (including some of the frame area).
  • Remove the backing from one side of the two-sided tape and stick it to the top, bottom, and sides of the window. After installing the tape, remove the adhesive backing from the other side.
  • Apply the shrink film around the window, gently stretching it as you work your way from one corner of the window to the other.
  • With the blow dryer on the highest setting, slowly move the dryer across the film to tighten it over the window. Don’t stand too close to the window while doing this, otherwise you’ll melt the shrink film.
  • Trim any film that’s left over.

V Seal Weatherstrip

The V Seal Weatherstrip, which is much like tape, is another $4 tool that allows a hassle-free installation and removal.

Installation:

  • Clean, measure, then cut as always. Clean the area. Measure how much V Seal strip is needed then cut away.
  • Bend the strip down the marked center line to create a “V” shape.
  • To seal, remove the backing and press the V strip into the corner of the window.

Rope Caulk

Caulking is a method of weatherstripping that targets the crack, gap, hole, or opening that allows air to seep through. Basically it’s like sticking silly putty in the exposed area to seal it off. However, unlike silly putty rope caulk provides a better stick, can weatherproof windows in an weather condition, and is a lot more pleasing aesthetically (unlike your lime green putty).

Installation:

  • Clean, clean, clean the area where caulk will be used.
  • Peel of a lay of the rope caulk “beads” and divide it based on how much you need.
  • Press to seal.

Window AC Cover

Though it’s easily overlooked, your window AC unit could be a major player in the game of air leakage. Window AC covers are often placed on the outside of inside units, but those covers only protect the unit from wind and rain. Installing window AC covers indoors will give your unit added protection by stopping air leaks.

Installation:
Tape the insulation liners to the face of the air conditioner and place the fabric cover over the windblock liner and air conditioner. Before you purchase an AC cover, measure the air conditioning unit because covers come in three different sizes.

With weatherproofed windows you can still enjoy skiing, snowball fights, and garbage lid sleds without the threat of winter weather becoming household guests.

Save

Group 1

Savings and Staying Warm with Window Air Conditioner Covers

Window Air Conditioner Cover

Air conditioners can be a gift from the heavens during sticky summer months, but as the seasons roll into cooler weather, those same air conditioners are a silent source of energy and monetary waste. Prevent energy loss, lower your heating/cooling costs, and protect the quality of your AC unit with window air conditioner covers.

Prevent Energy Loss

AC units get a much deserved break during cold months, but even when turned off they can still use up much energy. Uncovered air conditioners allow the cold outside air, dirt, dust, and other undesirables to enter the home and mix in with the warm air the heater provides. This creates an uncomfortable, inconsistent temperature throughout the house – some rooms are too hot, others too cold, and if you’re lucky at least one room will be just right. Air conditioner covers prevent energy loss by blocking the flow of air into and out of your home.

Energy loss does not only affect the house – it can be a drain on the energy bill as well.

Stop Money From Pouring Down the Drain (or flying through the air conditioner)

How much of your energy bill do you think is due to heating and cooling alone – under or over 20%? Believe it or not, 43% of your energy bill is devoted to keeping the house warm or cool. Along with other insulation solutions, you can erase 20% or more off energy costs with window air conditioner covers. When installed properly, AC covers keep the unit from acting as a source for air leaks.

Though less energy waste is the ultimate reason to use AC covers, it is not the only one. AC units also need protection from damages.

Protect The AC Unit From Damages

Overly heated rooms mixed in with the cold air coming through the AC can cause dampness, which leads to mold and mildew. Removing the mold and mildew will require one of three options:

  • Go through a lengthy process to remove the mold and mildew yourself
  • Hire a professional for the removal
  • Get a new unit (not recommended)

While it’s less pricey to do it yourself, the process takes a while and calls for removal of some parts in order to reach moldy areas. Window air conditioner covers are waterproof, making it easy to protect the air conditioner (and your health) from damages. Plus, the only manual labor involved will be installing the cover.

How to Install Window AC Covers

Even the less crafty of us can install an AC cover. All you need to provide is measuring tape because cover packages come with rest: fabric cover, plastic waterproof sheets, adhesive tape to secure the cover, and instructions.

Measure your AC unit to ensure that you purchase the right size for your air conditioner then follow the instructions for the cover.

No longer do cold weather months have to wreak havoc on your AC unit. Stop the energy waste, the sapping of your money, and the discomfort in your home by installing air conditioner covers.

Group 1

3 Places to Insulate with an Attic Stairway Cover

Stairway Cover
Stairway Cover

Creaky, drafty attics certainly have a place in the world of horror flicks, but that draftiness does nothing for the homeowner. Three often overlooked sources of poor attic insulation are the stairs, knee wall doors, and the scuttle hole access. Using a stairway cover is one way to shield all three of those areas from causing inconsistent temperatures in the attic and a bigger (much scarier) problem on your energy bill.

Attic Stairs

It may seem insignificant, but that large hole in the ceiling does nothing to stop air leaks. Attics stairs usually take up 10 sq.ft. of the ceiling, leaving a huge gap around the opening for air to swim on through. Installing a stairway cover requires a little bit of work but yields obvious results.

Knee Wall Doors

When building an attic under a sloped roof, that sloping creates an oddly shaped space underneath it. The shape is like folding a piece of paper in half, laying it flat, then lifting the top halfway up – simply put, a sideways triangle. A knee wall is basically a short wall that creates a room out of that space. To get in and out of that area (naturally), you need a knee wall door. Sometimes a knee wall door can lead to a space that is outside the home (usually the area is there to ventilate the roof), giving opportunity to air, critters, and who knows what else to make its way into your home. Properly sealing knee wall doors should definitely be a high priority on your insulation list.

Scuttle Hole Access

The attic scuttle hole is small, usually 2′ x 2′ entrance way to the attic. If a home doesn’t have stairs that lead to the attic, then the only way to get into it is through a scuttle hole. Just like with attic stairs, the area around the scuttle hole is where the damage occurs. A stairway cover or attic cover will work just as well on attics that only have the scuttle hole access; you’ll just need less material.


Now the attic can still be a scary place but insulating it doesn’t have to be. To minimize stress with this DIY project, use the right tools, wear protective gear if needed, and read the instructions before working with insulation products.

Save

Group 1

An Easy and Lightweight way to Insulate your Attic Stairway

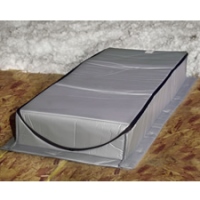
In our second installment of the “How to Insulate your Attic Stairway” series, we discuss another option to reducing drafts emanating from your attic stairway. For our previous post – see How to Insulate that Folding Attic Stairway with a Thermadome. The Attic Tent is an affordable, easy to install, lightweight solution that consistently gets great reviews from DIYers. It’s pretty much full assembled, all you have to do it get a staple gun to tape it down to the attic floor opening over the stairway and caulk down any loose material to get an extra good seal. Start to finish you can get this done in 15 minutes. It’s very effective in creating an air barrier and has a R Value of 3.2. You can almost see temperature difference and the associated cost savings immediately. It’s available in 5 sizes, so you’re almost certain to find a size that fits your attic stair way opening.
Attic Tent
Another plus to this solution is that a lot of electric companies offer a rebate on this product, sometimes as much as half the cost, so be sure to check with your local energy company.

Save

Save

Group 1

How to Insulate that Folding Attic Stairway

So you have an attic on the top level of your house and it’s leaking gobs of cold air out in the winter making 2nd floor of your house frigid. How to fix it? In this 3 part Attic Insulation series, we will investigate 3 solutions for insulating your folding attic ladder/stairway. Each solution has its own unique strengths. We hope to help our readers find the best solution that fits their needs.

THerma dome attic stairway cover
Thermadome

Solution 1: The Thermadome by Yankee Insulation Products: an insulated cover for your folding attic stair way. Since it’s constructed out of a durable laminated foil urethane insulation, it provide a very high R-Value of 13.6. The foam gaskets and velcro ti-downs around the product provide continuous draft seal. The inside dimensions of 27″W x 57″Lx10.5″H are spacious enough to accomodate most attic stairway openings. Assembly is straight forward, all you need to do it to caulk/glue all the pieces together. So if you’re looking for a solid, rigid, high R value solution, the Therma-Dome attic stairway cover will do the trick.

Group 1

Get the Most Out of Polyurethane Foam Insulation

Polyurethane Foam
Polyurethane Foam

Polyurethane foam has been around since the 1970s, but its use has recently exploded with more and more people jumping on the conservation bandwagon. DIY spray on insulation is a simple, cost-effective solution to air leaks in the home, blocking air intrusion and escape at the same time. In order to get the most out of foam insulation, here are a few bits of information to keep in mind.

What Foam Do You Need?
The biggest factor to consider when deciding which foam to use is simply this: how much area do you need to cover? Both the high expansion foam and low expansion foam expand to cover the area where sprayed, but they differ in a few ways as well.

High Expansion Foam
High expansion foam covers larger gaps, cracks, and the like than low expansion foam.  It also expands 30x when sprayed at 1″ thickness, so I’d advise against spraying liberally.

Low Expansion Foam
In contrast, low expansion spray foam is best used on smaller gaps and only expands by 10%.

How to Use the 2-tank Foam System
The 2-tank foam system makes installing foam insulation an easy do-it-yourself project, so as with any DIY project, make sure to wear protective gear.

In the 2-tank foam system, Tank B must be warmed up to make it the same creamy consistency as A; this allows for an even stream of foam. A few methods for warming Tank B include:

  • Keeping it in a warm room
  • Putting it in a tank warmer
  • Warming the tank in an electric blanket

The 2-tank system uses high expansion foam, so remember that spraying 1″ of thickness will expand 30x.

Which Rooms Need it the Most?
When installed in the draftiest, gap-ridden areas in the home, polyurethane foam insulation can save you up to 20% on cooling and heating costs alone. So which areas have the most potential for energy loss?

Attic and Garage
These areas typically suffer from poor insulation, making it easy for winter and summer to wreak a lot of havoc. Attics and garages can sometimes reflect (and even magnify) the temperature outside. The main source of insulation problems come from the ceiling and walls; check these first before going over the rest of the room for any missed gaps and cracks.

Basement
Basements often deal with humidity, which can lead to mildew and mold. First, make sure the basement receives proper ventilation, then seal all the air leaks. For basements, air leaks can be found around areas that lead outside, like air vents, ducts, and pipes.

Home Exterior
It may not seem like a big deal, but exterior gaps can cause just as much insulation problems as the ones inside. Dryer vents and water faucets (with hoses) are unexpected culprits of air leaks and can also contribute to that inflated energy bill you see each month.

Applying polyurethane foam insulation will help you control the temperature in your home and finally get a better grasp on the outcome of your energy bill.

Save

Save