Group 1

Retrofitting Parking and Canopy HIDs with LED Canopy Light Fixtures

LED Canopy Light Fixtures

For many business, indoor lighting is one of the most important decisions to be made. Equally important, however, should be how the outside is illuminated. For potential customers passing the building at night, or walking through the parking garage, the outside will be their first impression of your establishment. While HID lamps have been the standard outdoor lighting option for years, LED canopy light fixtures help provide many options to create a safe and inviting environment while greatly reducing both energy use and lighting costs.

Light Distribution

LED manufacturers made sure to provide many options to address a myriad of commercial lighting needs. The LED fixtures are available in two different types: Parking Garage Distribution and Canopy Distribution. The lamps also come in different shapes (round and square) to make the switch simple. The shapes allow multiple choices for mounting: ceiling, arm, and wall mount to name a few. HID lamps generally emit a somewhat orange light color. Their LED counterparts however, provide a cool white light. This gives them a much brighter appearance, and helps foster feelings of safety and comfort where installed.

Switching and Saving

Regardless of where the new lights are being installed, you’ll want to make sure the old ones are being properly replaced. LED canopy light fixtures are available in 20 to 53 watt options as replacements for the following HID lights:

  • 20W LED – 100W Metal Halide
  • 30W LED – 150W Metal Halide
  • 40W LED – 175W Metal Halide
  • 53W LED – 250W Metal Halide

The LED technology allows these lamps to use such low amounts of energy while still maintaining brightness. This is because the brightness is not dependent on wattage, but lumens. The higher the lumen count on a lamp is, the brighter the light emitted from will be. Further opportunities for savings are realized through dimmable and motion sensing lamps. By installing the LED canopy light fixtures, you’ll be cutting energy usage per fixture by up to 80% and as a result, energy costs.

Group 1

Does Ballast Compatibility Matter When Choosing LED T8 Lamps?

Plug and Play LED T8
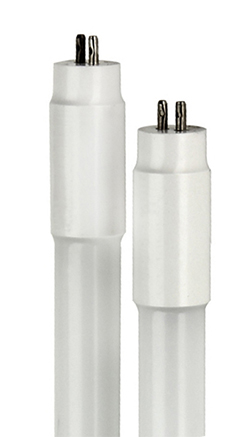
Traditionally, fluorescent T8 linear lamps have been used as the main light source in commercial buildings such as hospitals, warehouses, schools, and more. LED T8 lamps are quickly replacing their fluorescent counterparts. The LED technology provides higher efficiency, many color and lumen options, and sizes. Advancements in lighting capabilities have also led to more options for installation. When deciding on which lamps to replace your fluorescent T8s with, one of the main things to consider is the ballast type. Knowing the difference between a Plug and Play LED T8 and a Ballast Bypass T8 will make the process of switching even easier.

Type A

Ballast compatibility absolutely matters when the LED lamp you’ve chosen is of the UL Type A variety. The Plug and Play LED T8, also referred to as direct fit, is the easiest of the two types to install. This lamp works directly with the existing ballast to quickly replace the fluorescent T8. While this is the simplest installation method, the LED lamp must be compatible with the ballast of the fluorescent it is replacing in order for the new lamp to work. The makers of the LED T8 typically provide a list of compatible ballasts. Make sure to check out this list before purchasing your replacement lamps.

Type B

LED lamps classified as ballast bypass, direct wire, or UL Type B do have a more involved installation. As a result, it is best to hire an expert electrician to complete the process. The Ballast Bypass T8 does just that. The technology of these lamps works straight from the line voltage that flows through the sockets.The process of retrofitting fluorescent fixtures for this LED type entails the removal of any electrical ballasts as well as verifying non-shunted sockets are in the fixture. The initial installation costs of the lamp is made up for by getting rid of the maintenance costs the ballast would otherwise need.

Both Plug and Play LED T8 and Ballast Bypass T8 options provide as much as 40% more savings in energy use and costs when compared to fluorescent lamps. Having an understanding of how the ballasts impact your fixture, installation process, and overall maintenance can help you better choose which lighting option will work best for you.

Group 1

Benefits of the High Bay LED Retrofit

high bay LED retrofitIn commercial and industrial buildings, High Intensity Discharge, or HID, light fixtures are commonly found. These are high voltage fixtures that use a mix of metals and gases to create a bright and powerful white light. With each year, and as technology continues to advance, there are far more options for lighting than ever before. Among the most energy efficient options for illuminating any space are LEDs. Naturally, the larger the space, the greater the opportunity for savings. Making the switch from an HID light fixture to a high bay LED retrofit in your facility provides great savings in energy, energy costs, and much more.

Stacking up Savings
While HID light fixtures are the standard, their high voltage and wattage requirements result in high energy consumption. This leads to the cost of energy going up along with it. In contrast, LEDs are powered when a microchip receives an electrical current to create the light. The difference in technology is how a 90-watt high bay LED can replace a 400-watt HID light fixture.

In addition, LEDs contain technology called a heat sink, which absorbs the heat that is created by the light. Heat sink technology allows for up to 20% in air conditioning savings, furthering savings in energy costs. As if this isn’t enough, many of these energy saving lights are also DLC listed. This rating means that many of these fixtures qualify for energy rebates with local utility companies.

Where do they go?
High bay fixtures are designed for use in buildings with ceilings that are typically 20 to 45 feet in height. This makes them ideal for installation in gymnasiums, manufacturing plants, factories, warehouses, and other structures with high ceilings. Spaces such as these require illumination from all sides, and the LEDs provide it. The high bay LED retrofit is not only energy efficient, but long lasting. On average, they last as long as 50,000 hours. The long lifespan reduces the need for frequent replacement, which is ideal given how high up they’re installed!

The focus of LED lighting technology is on their power. They are designed to provide illumination of the highest quality without sacrifice. These energy efficient fixtures deliver brilliant light without affecting the temperature of the building, while saving energy and reducing energy costs from the moment they’re installed.

Group 1

Fluorescent T5 vs LED Bulb Replacement

As recently as 2010, the United States Department of Energy found that nearly 80 percent of lamps being used in commercial buildings were fluorescent. These lights are commonly found in large industrial buildings or other commercial edifices, such as hospitals and schools. They provide up to 75 percent more energy savings than their incandescent counterparts. That being said, as LED technology updates and shifts, even more savings can be realized by switching from fluorescent tubes to LED T5 plug and play or LED T5 direct wire lamps.

LED T5 direct wirePower Up
One of the major identifiers of any light is its wattage. This is the main indicator of how much you’re going to save when you switch. For example, a standard 28-watt fluorescent tube can be replaced by a 15-watt LED lamp. Additionally, a 54-watt high output fluorescent tube is easily replaceable by an LED that consumes only 25-watts of energy. With such a difference in the amount of power being used, savings in energy costs quickly follow installation.

Plug and Play
Plug and Play, or direct wire, LED T5 lamps make switching from fluorescent to LED simple. These bulbs are easy and quick to install. Replacing the ballast in your current fixture won’t be necessary, as it plugs directly into the fixture without any rewiring. This also reduces the the cost of labor and reduces maintenance for facility managers.

Bypass the Ballast
Ballast bypass, also known as LED T5 direct wire lights are slightly different from their plug and play counterparts. These lamps cannot be installed without first removing the existing ballast in a fixture. This is because they operate using the line voltage that flows straight to the sockets, essentially doing what its name indicates, bypassing the ballast.

Time is Money
On average, an LED T5 lamp is rated to last as long as 50,000 hours. This is more than double the standard 24,000 hour life of a fluorescent tube. Installing lamps with this long of a lifespan eliminates the need for frequent replacement. Also worth consideration are warranty periods. Standard fluorescent tubes have a warranty period up to 2 years. Conversely, the typical warranty period for LED fluorescent tubes is 5 years.

These lamps are available in cool and daylight white and designed with high lumen outputs. This provides both consistent color and illumination for a seamless switch. With lower power usage, longer lifespan, and a longer warranty, whether you choose an LED T5 plug and play or a ballast bypass lamp, you’re easily looking at saving as much as 45 percent on both energy usage and costs.

Group 1

Cost Effective and Easy to Install Weatherization Options

To prevent cold air from entering your home during winter, and hot air from flowing in during summer, you need to close up the gaps in your windows to create a tight seal.

Not only will your home feel more comfortable, you will also lower your monthly energy costs with these inexpensive window weatherization tools.

Rope Caulk

Caulking is a method of weatherstripping that targets the crack, gap, hole, or opening that allows air to seep through. Basically it’s like sticking silly putty in the exposed area to seal it off. However, rope caulk provides a better stick, can weatherproof windows in any weather condition, and blends in with your decor. rope tape

Installation:

  • Clean, clean, clean the area where caulk will be used.
  • Peel of a lay of the rope caulk “beads” and divide it based on how much you need.
  • Press to seal.

Foam Tape

Foam tape is used to seal windows that slide or swing. It sticks to the edges or bottoms of windows to prevent air leakage when windows are closed.

Installation: Foam tape is easy to install and at less than $3 it is an inexpensive weatherization solution.foam tape

  • First, clean and dry the area  where the tape will be applied. If the area is dirty, wet, and/or cold, the tape won’t stick properly or it will easily loose its stickiness factor. It must be more than 40 degrees Fahrenheit.
  • Cut the amount of foam tape needed based on the length of window sides/bottom.
  • Remove the adhesive backing then press the tape into place to cover the area in need of sealing.

Shrink and Seal Window Kit

If you have scissors, a blow dryer, and $4 you can easily weatherproof windows with a Shrink and Seal Window kit. This kit will seal the whole window from the inside and increase the R-value, or insulating power, of the window by as much as 90%.

Installation: window kit

  • Again, you need to clean and dry the area before applying any sealing. You should also clean the insides of windows because you won’t be able to clean that area again until you remove the shrink film.
  • Cut the amount of shrink film needed. Cut enough film to cover the entire window (including some of the frame area).
  • Remove the backing from one side of the two-sided tape and stick it to the top, bottom, and sides of the window. After installing the tape, remove the adhesive backing from the other side.
  • Apply the shrink film around the window, gently stretching it as you work your way from one corner of the window to the other.
  • With the blow dryer on the highest setting, slowly move the dryer across the film to tighten it over the window. Don’t stand too close to the window while doing this, otherwise you’ll melt the shrink film.
  • Trim any film that’s left over.

Save

Save

Save

Group 1

Attic Stair Covers Save Energy and Improve Air Quality

Most attics are not well insulated, which depending on the time of year, causes them to be either extremely hot or attic stair cover1extremely cold. Attic doors are also not generally insulated, which allows for a tremendous amount of energy loss throughout the year. Even the tiniest gap around the attic door perimeter — as small as 1/32 (0.08 cm) — is like leaving a 5-square inch opening or window open all year!

Insulating the attic door with an attic stair cover is a light-weight, simple, and cost-effective way to reduce the amount of unwanted air infiltration from the attic into the home. It also improves indoor air quality by reducing allergen and dust flow from the attic.

The Attic Tent is easy to install. You just need to secure the Attic Tent in place with staples to the surface, and then add a bead of silicone caulk around the seam to create an airtight seal. It  provides an R-value of 6.6 and has been proven to reduce air transfer up to 76%. This means, your Attic Tent will pay for itself in one year, and save you money each year thereafter.

The Battic Door Attic Stair Cover Kit includes the rigid box (stair cover), rubber gasket, a reflective shield and optional R-50 insulation. The stair cover fits between trusses and is available in 3 sizes to fit most pull down ladders.  All kits include durable stair cover and weatherstripping and is easily installed in minutes with no tools. It is made in the USA from recycled materials.

Attic stair covers are an easy, affordable way to save energy and improve the air quality in your home.

Group 1

Practice What You Teach: Sustainability on College Campuses

Colleges and universities are ranked on a variety of criteria; from class size, retention and graduation rates to whether or not they are a top party school or have a successful athletic program.

In recent years, colleges and universities are also being judged by their “green” initiatives. Princeton Review’s Top List of Green Colleges and Sierra Club’s list of America’s Greenest Universities ranks campus sustainability practices. The categories that are examined are: Energy, Investments, Food, Innovation, Academics, Planning, Purchasing, Transport, Waste, and Water.

Sustainability measures often save a significant amount of money, and they also demonstrate that colleges are practicing what they teach.

Of the categories listed above, water and energy have an immediate financial payoff. By making the switch to energy efficient lighting and water saving devices colleges can save millions!

Boston College’s energy-efficiency efforts have resulted in annual energy savings of more than 4 million kWh, and cost savings of $650,000. The multiple conservation measures implemented on campus include more than 1.4 million square feet in lighting upgrades. Campus lighting upgrades include motion sensing, daylight harvesting, and ballast replacements. In addition, they distributed 7000 12.5 Watt LED bulbs to students.

Assumption College in Massachusetts installed toilet flush valves and water-saving shower heads in 22 buildings, which should save nearly three million gallons of water per year.

Students at American University measured the flow rate of water fixtures on campus and realized that AU could be more efficient with its water use. They shared their findings with Office of Sustainability staff members who then estimated that once all the aerators are replaced, the university will save 570,000 gallons of water, enough to fill AU’s swimming pools and almost $10,000 per year.

For other ideas on how to make your school more green and to connect with other sustainability departments you may want to visit the Association for the Advancement of Sustainability in Higher Education.

Conservation Mart has a wide selection of energy and water saving devices and would love to help your campus go green!


Group 1

Energy Saving Kits and Weatherization Workshops Available Across the US

Weatherization Kit

The U.S. Department of Energy Weatherization Assistance Program provides grants to states, territories, and some Indian tribes to improve the energy efficiency of the homes of low-income families by providing energy conservation products.

The grants enable local governments and nonprofit agencies to provide weatherization services and home energy upgrades. The low-cost improvements, like adding weather stripping to doors and windows to save energy, lead to long-term savings.

In addition to helping families save money, the resources saved through energy conservation also helps our country reduce its dependence on foreign oil and decreases emissions of greenhouse gases.

The Weatherization Assiatance Program (WAP) has training centers across the country and boasts some impressive statistics:

  • Since the inception of the WAP, over 7 million homes have been weatherized with DOE funds.
  • Energy savings average 35% of consumption for the typical low-income home.
  • Occupants of weatherized homes experience in the range of $400 in annual savings on their energy bills, at current energy prices.
  • Weatherization measures reduce national energy demand by the equivalent of 24.1 million barrels of oil per year.

If you do not have a WAP in your area, look for a Community Action Partnership (CAP) program.

Their weatherization program is available for both homeowners and renters who receive fuel assistance. Using local licensed contractors, the program provides free major improvements, such as attic and wall insulation, air sealing, and other energy-saving repairs.

These organizations and other local agencies, like the Community Energy Project in OR, offer weatherization workshops to learn how to install energy saving devices in your home.

Energy Saving Kits often include items such as reusable vinyl storm window kits, door weatherstripping, pipe insulation, a compact fluorescent light and more.

Conservation Mart offers a wide variety of weatherization, energy conservation products and water saving devices directly to consumers and we are happy to customize kits for your organization. Please call us for a quote: 1-800-789-8598.

Save

Group 1

How is the WaterSense Label on Showerheads Useful?

WaterSense Labeled Showerheads

WaterSense, a program by the U.S. Environmental Protection Agency, uses its labels and certifications to protect the future of our nation’s water supply by offering people a simple way to use less water with water-efficient products, new homes, and services. The goal of the program is to help consumers make smarter choices with the water they use that save money and maintain high environmental standards. WaterSense labeled products and/or services are certified to be at least 20 percent more efficient without sacrificing performance. These products have the potential to help our country save billions of gallons of water annually.

When it comes to showerheads, water efficiency usually has to do with features such as low-flow and restricted-flow. Showering accounts for approximately 17% of residential indoor water use, proving to be one of the leading ways we use water in the home. For the average family, that becomes nearly 40 gallons per day of water usage which is close to 1.2 trillion gallons of water used annually in the United States just for showering.

Standard showerheads use 2.5 gallons of water per minute (gpm). WaterSense labeled showerheads use no more than 2.0 gpm and ensures that these products still provide a satisfactory shower that is equal to or better than conventional showerheads on the market. The savings that come with simply switching to WaterSense labeled showerheads are absolutely worthwhile. An average family could save 2,900 gallons per year by installing WaterSense labeled showerheads. Because these savings simultaneously reduce demands on water heaters, they also save energy. An average family could save more than 370 kilowatt hours of electricity annually by using WaterSense products. To further put this into scale, if every home in the United States installed WaterSense labeled showerheads, we could save more than $2.2 billion in water utility bills and more than 260 billion gallons of water annually. Furthermore, we could avoid about $2.6 billion in energy costs for heating water.

Whether you are replacing an older, inefficient showerhead or looking for ways to reduce water use and utility bills in your home, look for WaterSense labeled showerheads along with faucets, faucet accessories, and toilets to help you identify models that save water and perform well.

Group 1

What Does High CRI Mean?

Color Rendering Index Measurement

One of the most useful measurements when referring to a lighting source is the Color Rendering Index, also known as the CRI. The CRI measures the ability of a light source to accurately show all frequencies of its color spectrum when compared to a perfect reference light, such as daylight. In other words, it is a measure of a light source’s ability to show object colors “realistically” or “naturally.” CRI is rated on a scale from 1-100. The lower the CRI level, the less accurately colors will be reproduced. The higher the number, the better the color rendering ability.

For a light source to be considered to have a “high CRI,” it must measure to be a 90 or above. For this reason, this CRI level is also the most acceptable for professional projects and imaging.  This simply means that these bulbs are the closest to showing true object colors, or having a perfect CRI of 100. Light sources that are incandescent radiators have a CRI of 100 since all colors in their spectrum are rendered equally. Often times, LED light bulbs with a high CRI can be worthy replacements for incandescent light bulbs. Although high CRI bulbs can be used for several different projects, depending on the desired illumination, they are usually an excellent choice for retail, art galleries, museums, high end homes or anywhere extreme color accuracy is required.